US English (US)
SR Serbian

Contact Us

If you still have questions or prefer to get help directly from an agent, please submit a request.
We’ll get back to you as soon as possible.

Please fill out the contact form below and we will reply as soon as possible.

  • Contact Us
English (US)
US English (US)
SR Serbian
  • Home
  • CloseOut Web App
  • Administration
  • Administration of Templates
  • Managing Workflow

How to set a watermark to a project workflow?

Written by Lada Paunovic

Updated at May 17th, 2023

Contact Us

If you still have questions or prefer to get help directly from an agent, please submit a request.
We’ll get back to you as soon as possible.

Please fill out the contact form below and we will reply as soon as possible.

  • CloseOut Web App
    Getting Started Dashboard New Tasks GIS Works Navigator Control Panel Monitoring Work Scheduler Reports Video Time Tracking Time Validation Administration Security Notifications
  • CloseOut Mobile App
    Android iOS
+ More
  1. Log into CloseOut.
  2. Make sure that the Watermark option is set for specific project. 
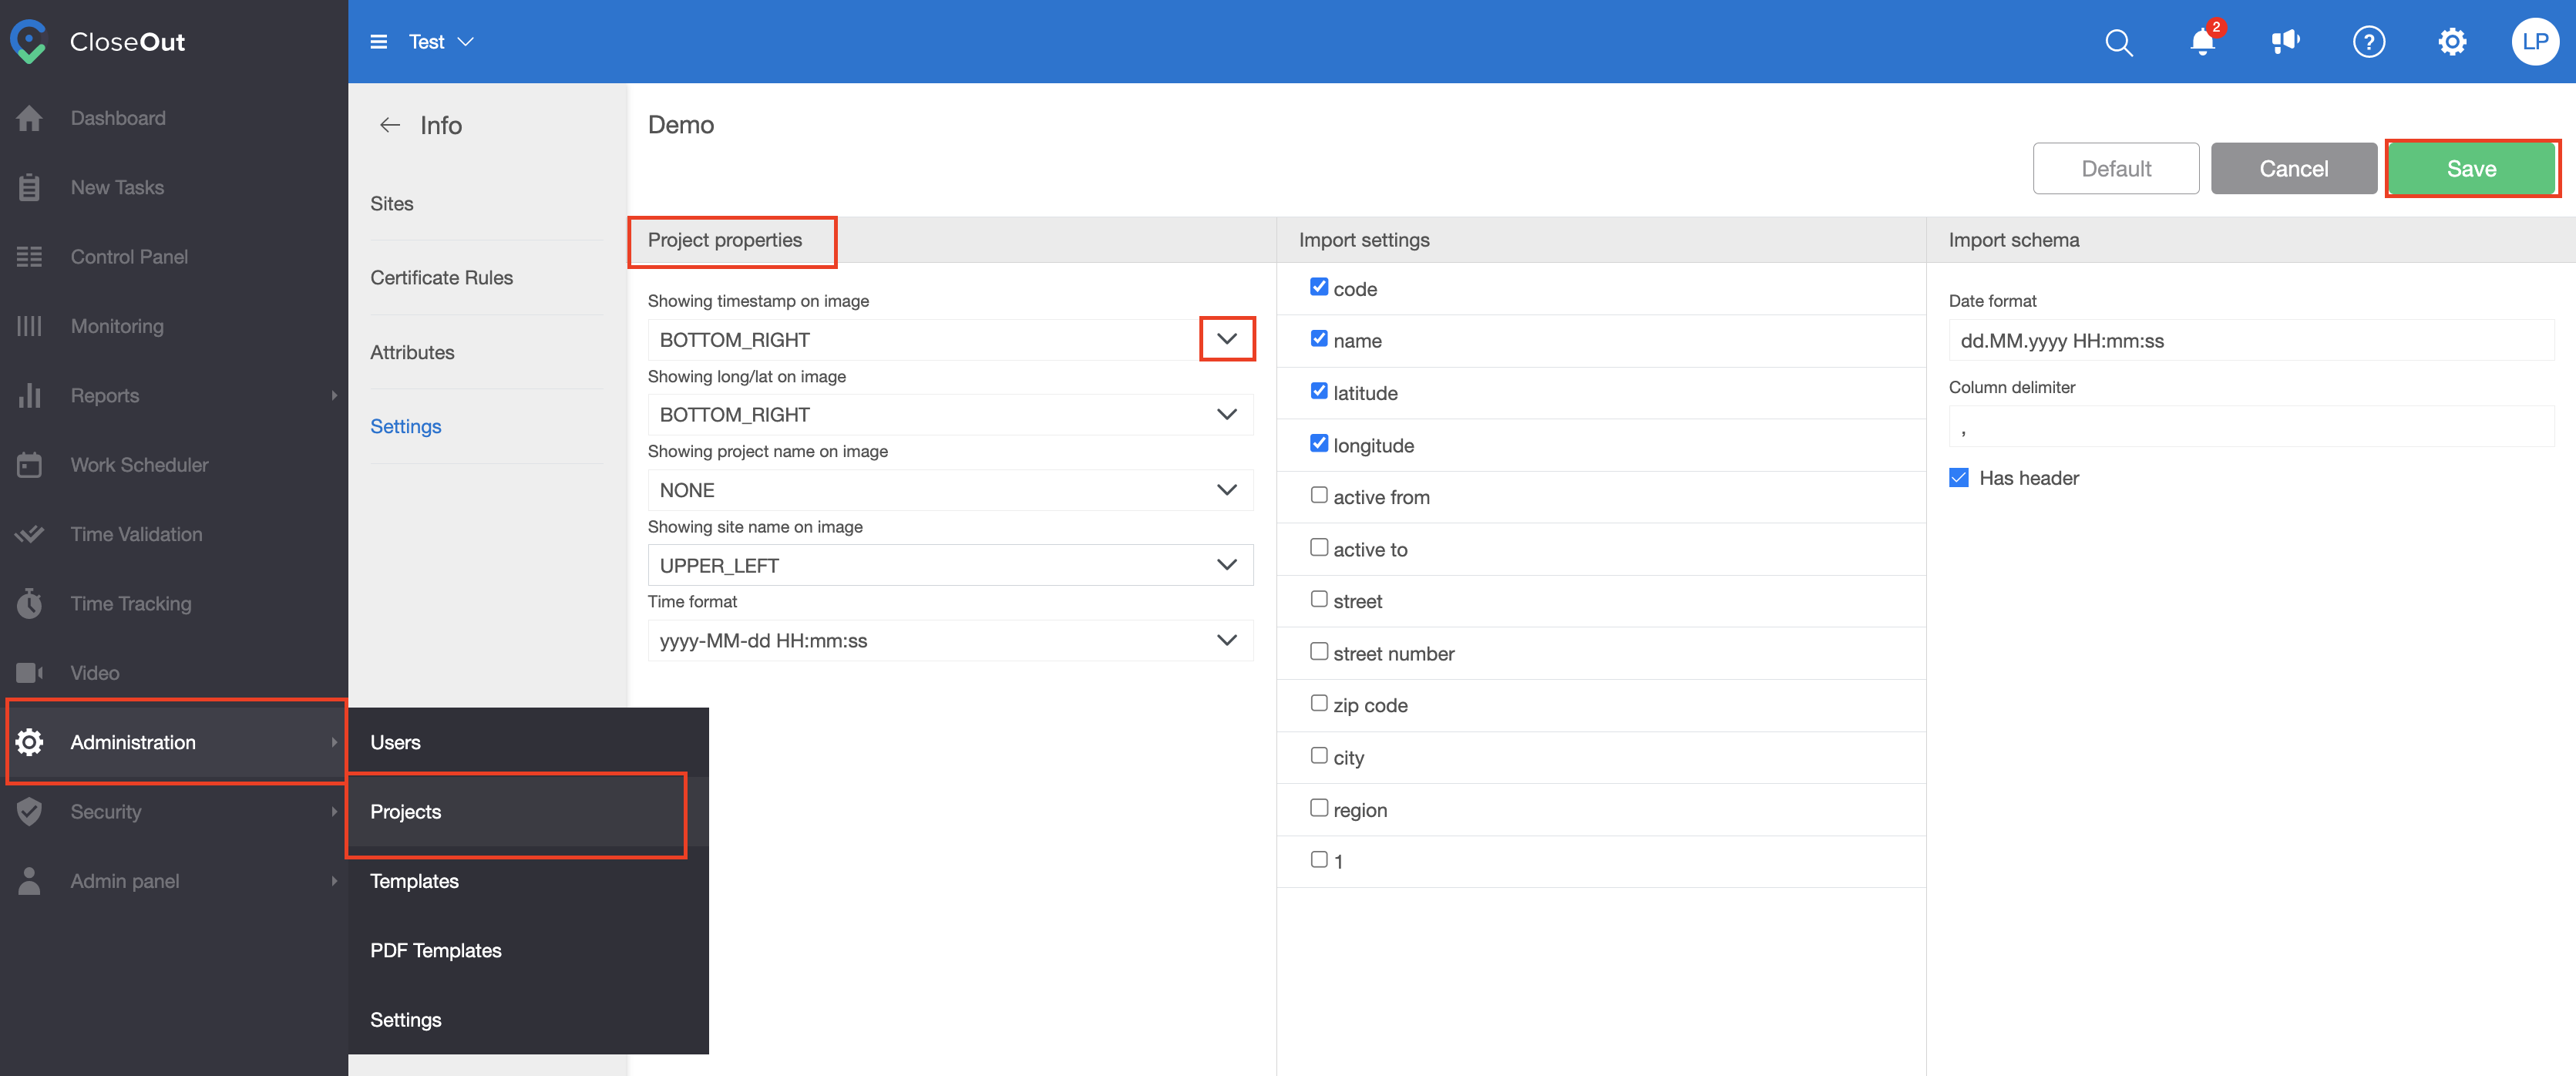
  3. In the Administration tab select Projects.
  4. Chose your project from the list, and click on its name.
  5. Select Settings tab and in the column Project properties select what information should be displayed and at what position.
  6. Click Save.

Next step is to decide on which photos inside your project you would like to have watermark.

Great news

You set this only once and it is applying to all your sites in this project. You can edit it any time.

 
  1. In the Administration tab select Templates.
  2. Set the dropdown menu to Project workflows.
  3. Open the project workflow that you want to apply watermark to.
  4. On the right panel, click the Watermark button to apply the watermark to the entire project workflow.
  5. You can also apply a watermark only to certain positions by hovering over that position and clicking on the watermark icon on that node.

Tip:

You can remove the watermark from the specific element by clicking the Watermark button on the placeholder level, or from the haul project, by clicking on the watermark icon on top of the screen. Once removed, the watermark icon no longer displays for that specific placeholder or for the entire project.


Your browser does not support HTML5 video.

*Note: The English language version of this video will be available soon.

watermark set workflow

Was this article helpful?

Yes
No
Give feedback about this article

Related Articles

  • How can the administrator create a new workflow template?
  • How can the admin create a workflow template using import?
  • How can the admin copy elements from an existing workflow template?
  • How to create or edit a project workflow?

Copyright 2025 – CloseOut.

Knowledge Base Software powered by Helpjuice

Definition by Author

0
0
Expand