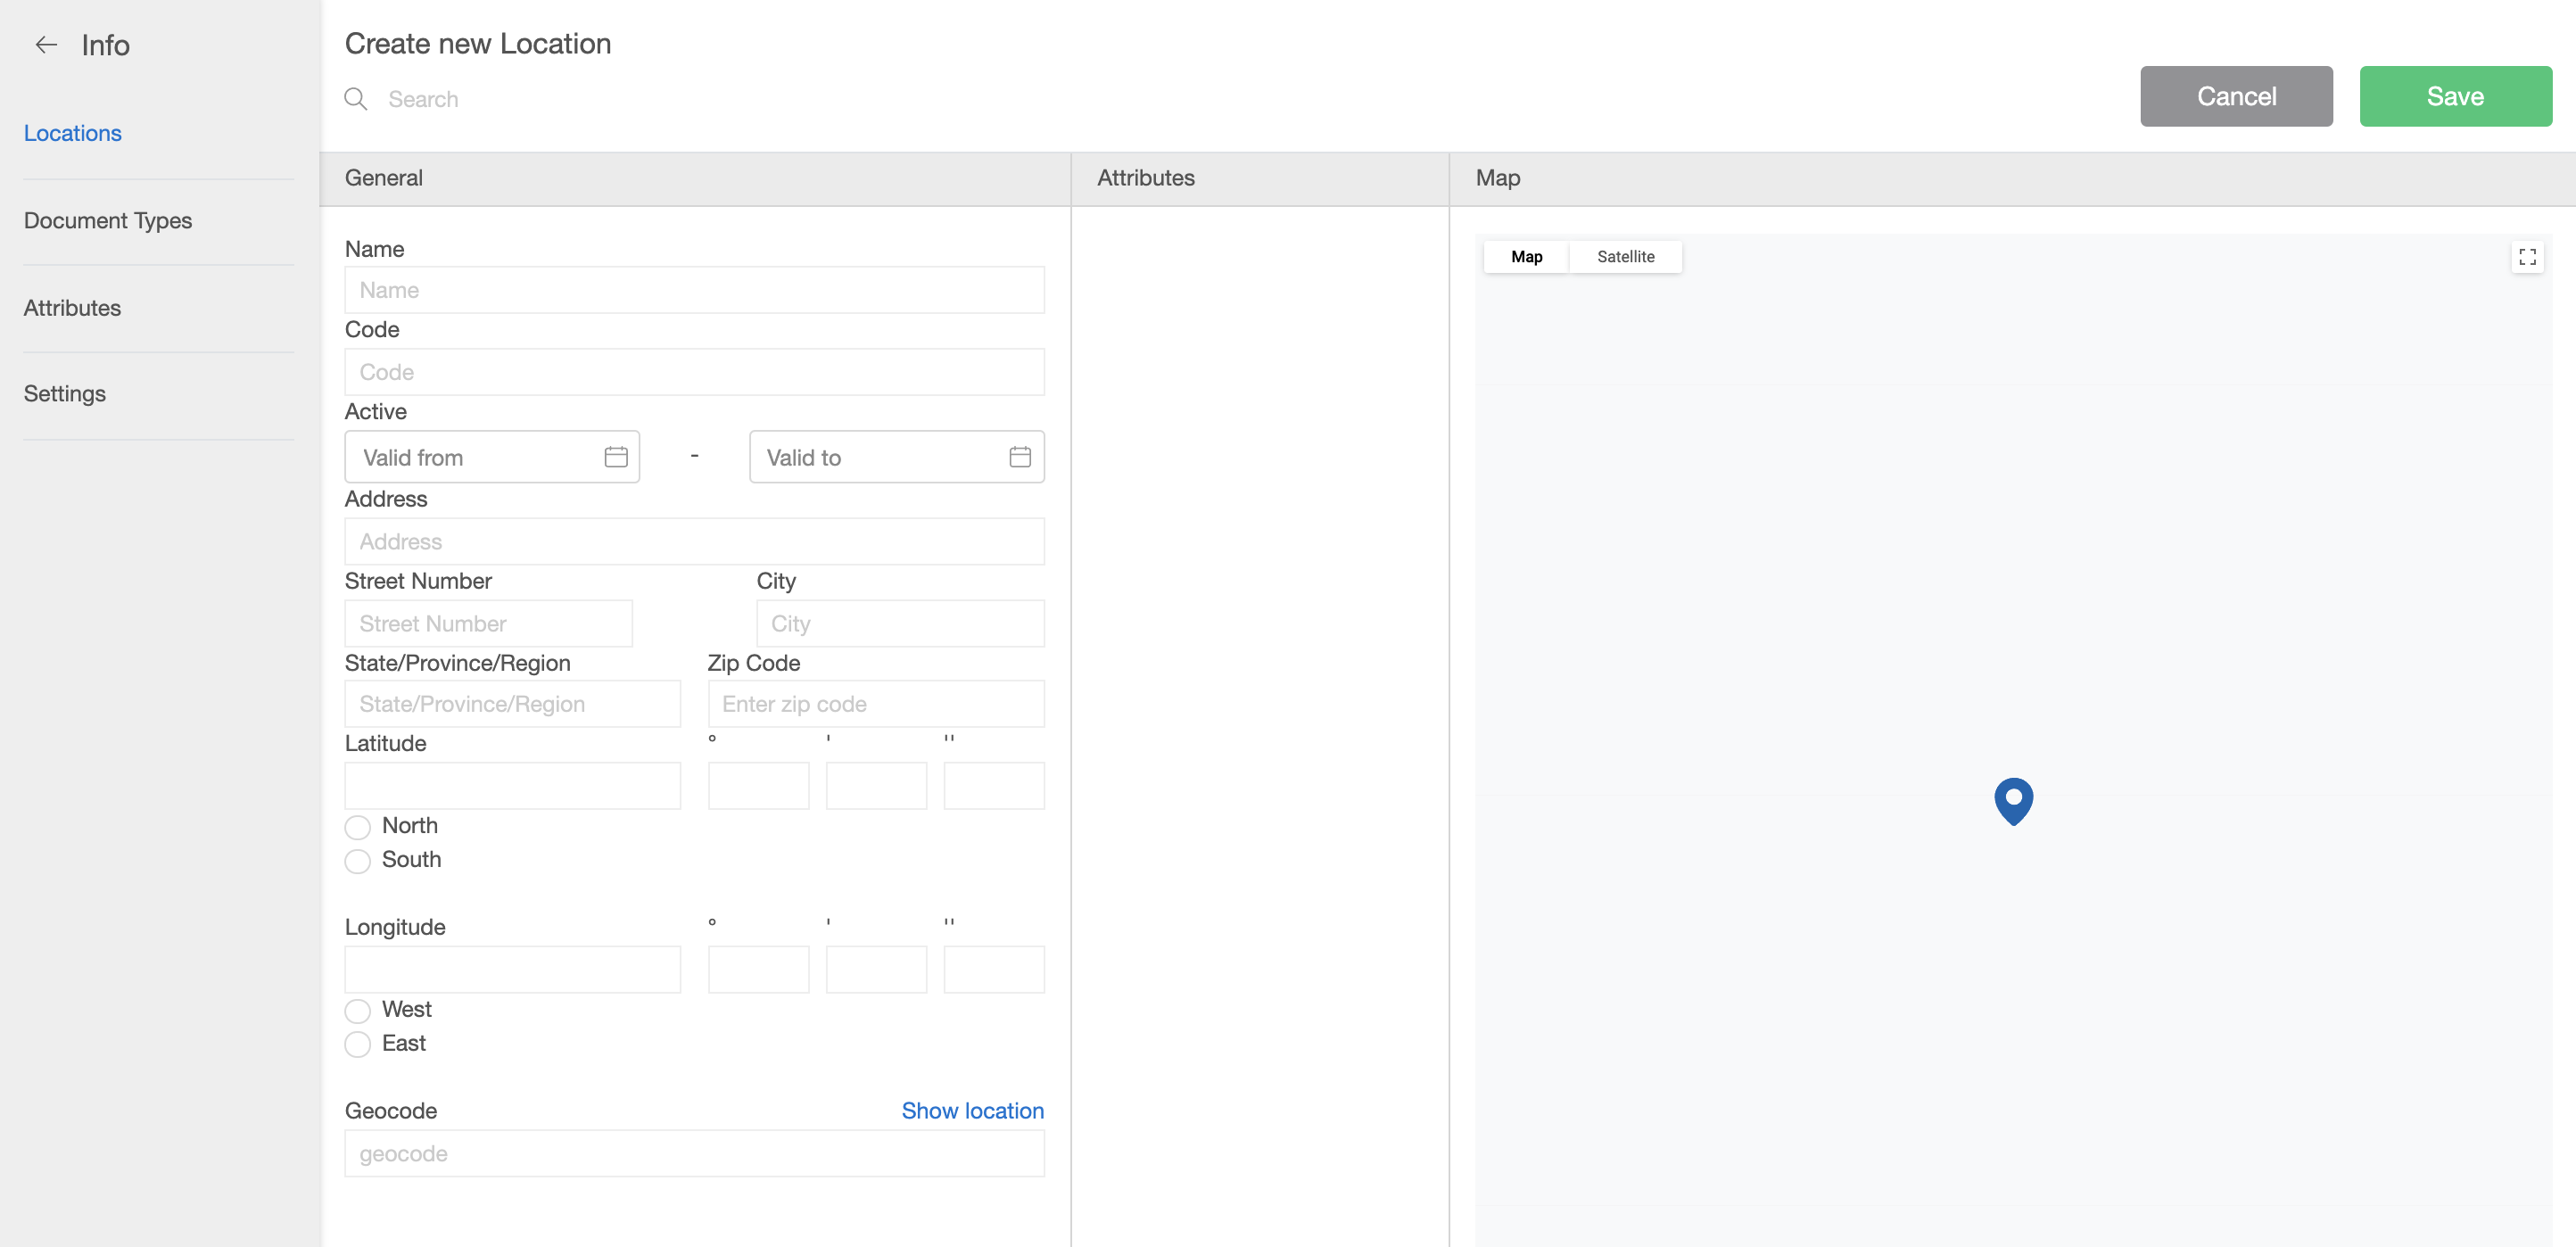
You can create a new project site in a couple of ways:
Creating a new site manually:
- Log into CloseOut
- In the Administration tab click Projects.
- Select a project that you want to add a site to.
- Enter the site details. You can also pick a place on the map, and the geographical details will be added automatically. If you don't have the longitude and latitude, you can enter a precise address, and then click Show location, and the longitude and latitude file will populate automatically.
- Click Save. The site is now successfully added.

Creating a new site via CSV import:
- Log into CloseOut
- In the Administration tab click Projects.
- Clicking the import button displays a modal window from which you can import the site.
- Select filters for possible duplicate data in the CSV file. You can either upload a file from your computer, or by drag-and-drop.
- Click Done. The site is now successfully imported.

Tips for creating a CSV file
CSV format should be: code, name, latitude, longitude if you haven't added any other predefined columns through the setting / Import setting, or created some new attributes. If you don't have information about long or lat, you can write 0.0 in that column.
When creating your CSV file, ensure that you have the right header setting if there is a header in your CSV file. You can set it through settings / Import schema.
If you have commas in the project or site name, and you are creating a CSV file with another delimiter, you need to change the column delimiter in the CloseOut application from commas to that other symbol through the Setup / Import Scheme option.
Also, when converting your document into a CSV file, choose CSV UTF - 8 if your list of sites contains non-English characters such as č, ć, š, etc.
Helpful Hints
Sometimes, sites don't have a predetermined code upon import, or there is a certain format or naming convention that needs to be followed in site naming and or site coding. For instances like those, there are several parameters that you can pre-set and utilize in your site naming or site coding convention.
To get to these options, go to Administration - Projects - Settings, where you can utilize pre-set parameters or a combination of them in either site naming or site coding.
The available parameters have to be typed a certain way (as shown in yellow) when used, and the combination or order is arbitrarily left to the user. The available parameters are:
${projectCode} - project code (Inserts project code into site name or code)
${projectName} - project name (inserts project name into site name or code)
${date} - date (inserts date into site name or code)
${dateTime} - date time (inserts date and time into site name or code)
${locallndex} - local number index (inserts local index number into site name or code starting from 1)
${tenantUnique} - tenant unique index (inserts a tenant unique code like SX1SD3 into site name or code)
${wfName} - workflow name (inserts the name of the workflow used into site name or code)
Note: One can combine these parameters with other things as well, like punctuation signs ( : _ - ), letter combinations, department codes etc.
An expression written as RN-${date}-${projectCode}-${tenantUnique} would yield a site code or a site name with the following format: RN-20250417-40172-XM1DN1
The new name or code WILL NOT change the naming or coding of already created sites, it will only apply to future sites created from the point it was set up.
