- Log into CloseOut.
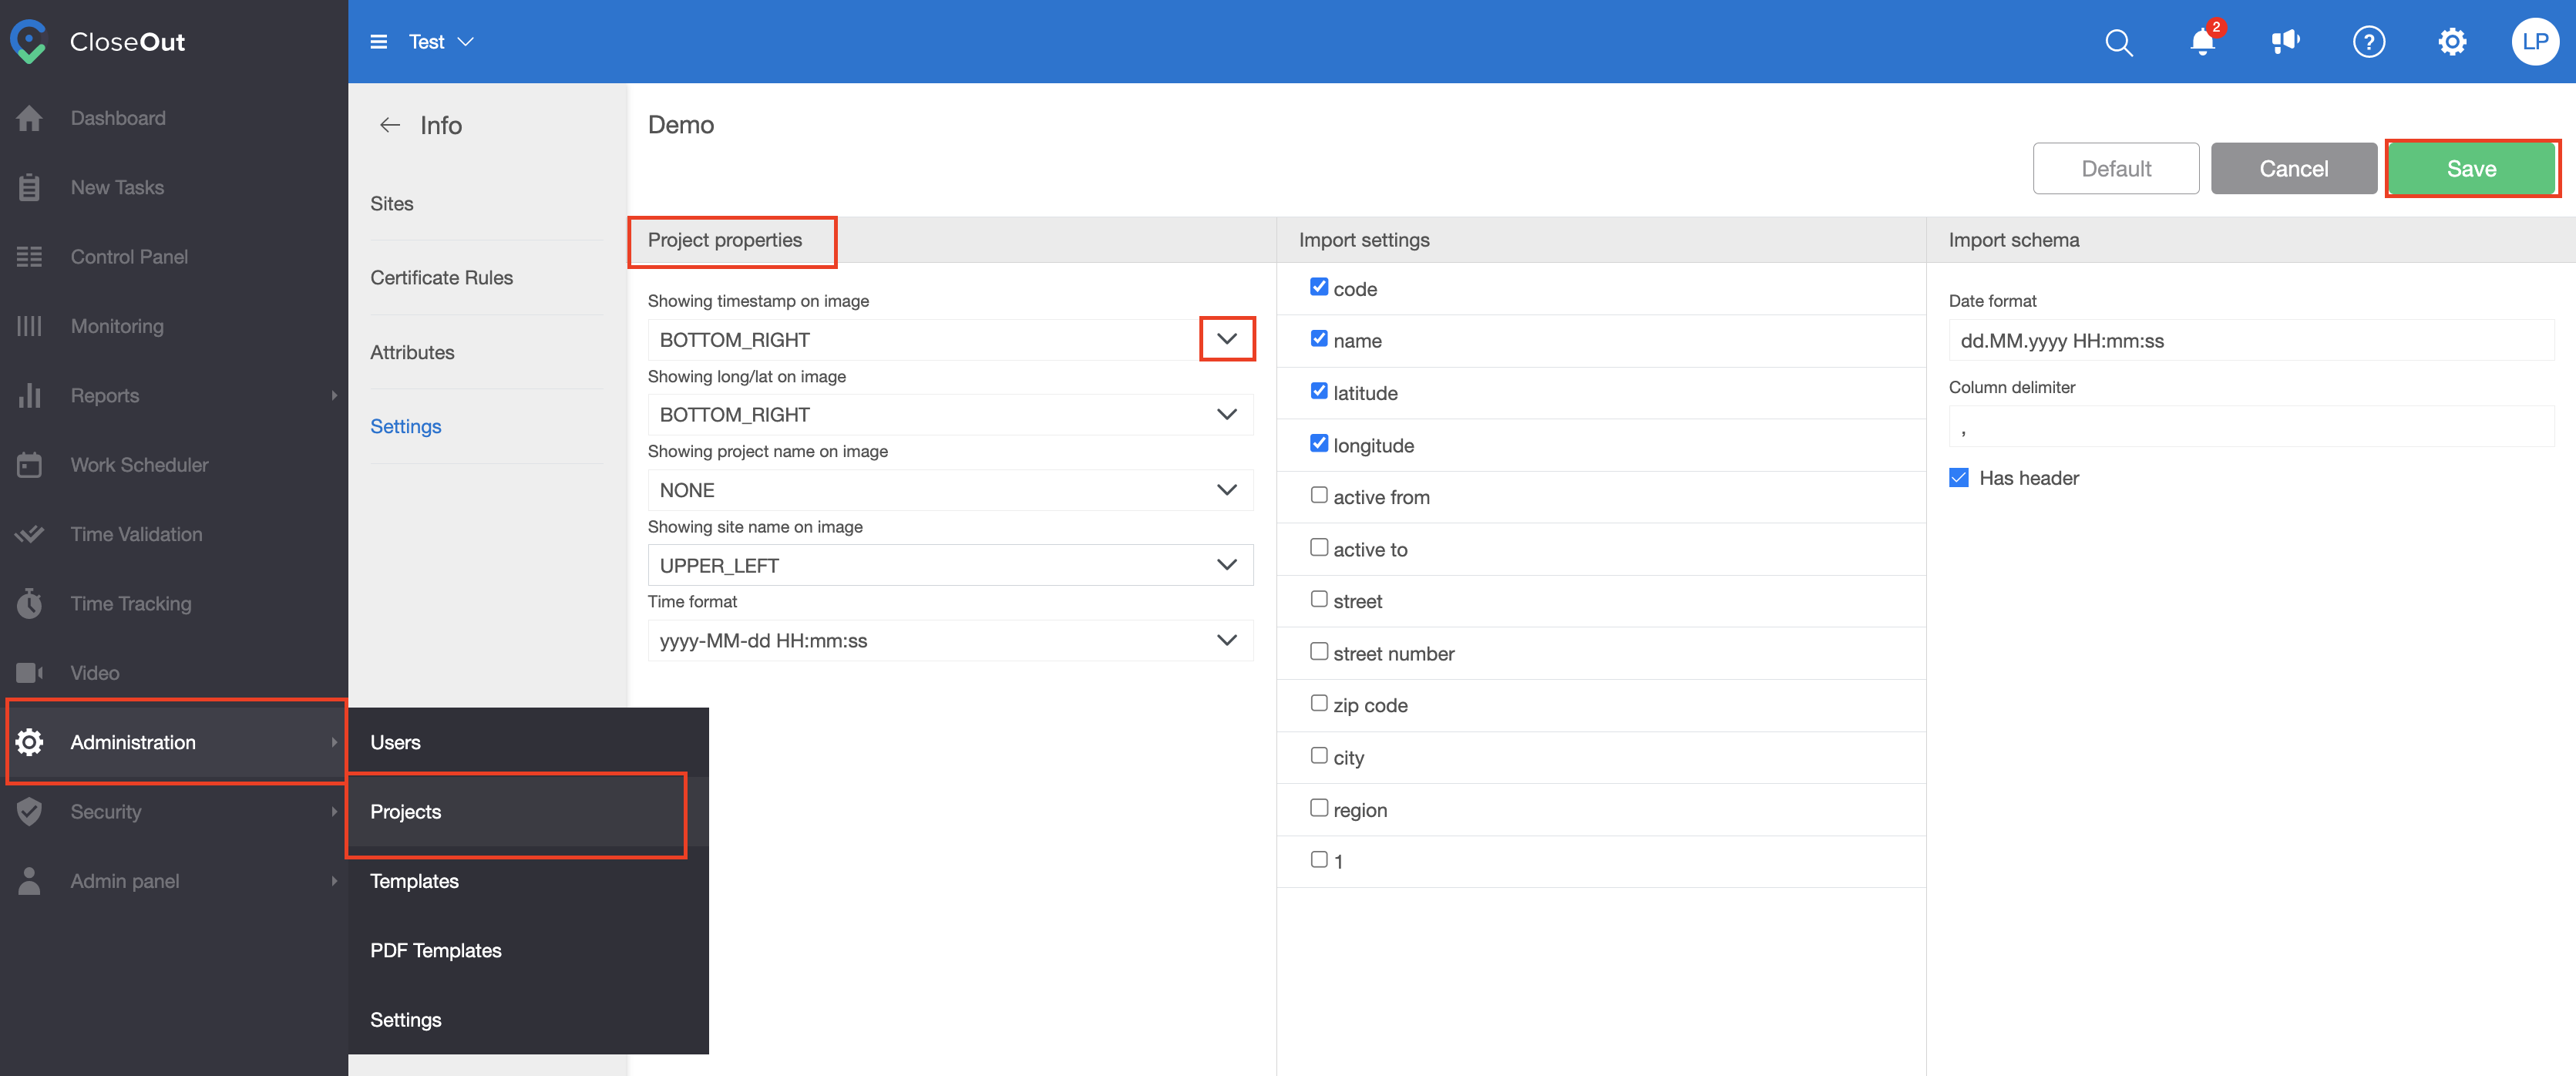
- Make sure that the Watermark option is set for specific project.
- In the Administration tab select Projects.
- Chose your project from the list, and click on its name.
- Select Settings tab and in the column Project properties select what information should be displayed and at what position.
- Click Save.

Next step is to decide on which photos inside your project you would like to have watermark.
Great news
You set this only once and it is applying to all your sites in this project. You can edit it any time.
- In the Administration tab select Templates.
- Set the dropdown menu to Project workflows.
- Open the project workflow that you want to apply watermark to.
- On the right panel, click the Watermark button to apply the watermark to the entire project workflow.
- You can also apply a watermark only to certain positions by hovering over that position and clicking on the watermark icon on that node.

*Note: The English language version of this video will be available soon.