When creating your project, the ZIP path of all your files in the export will be automatically assigned based on the structure of your project.
The downloaded ZIP folder with all the files will mimic the same path: folder/subfolder/file with an automatic name convention mirroring a workflow structure.
For example, the automatic ZIP path would look like this:
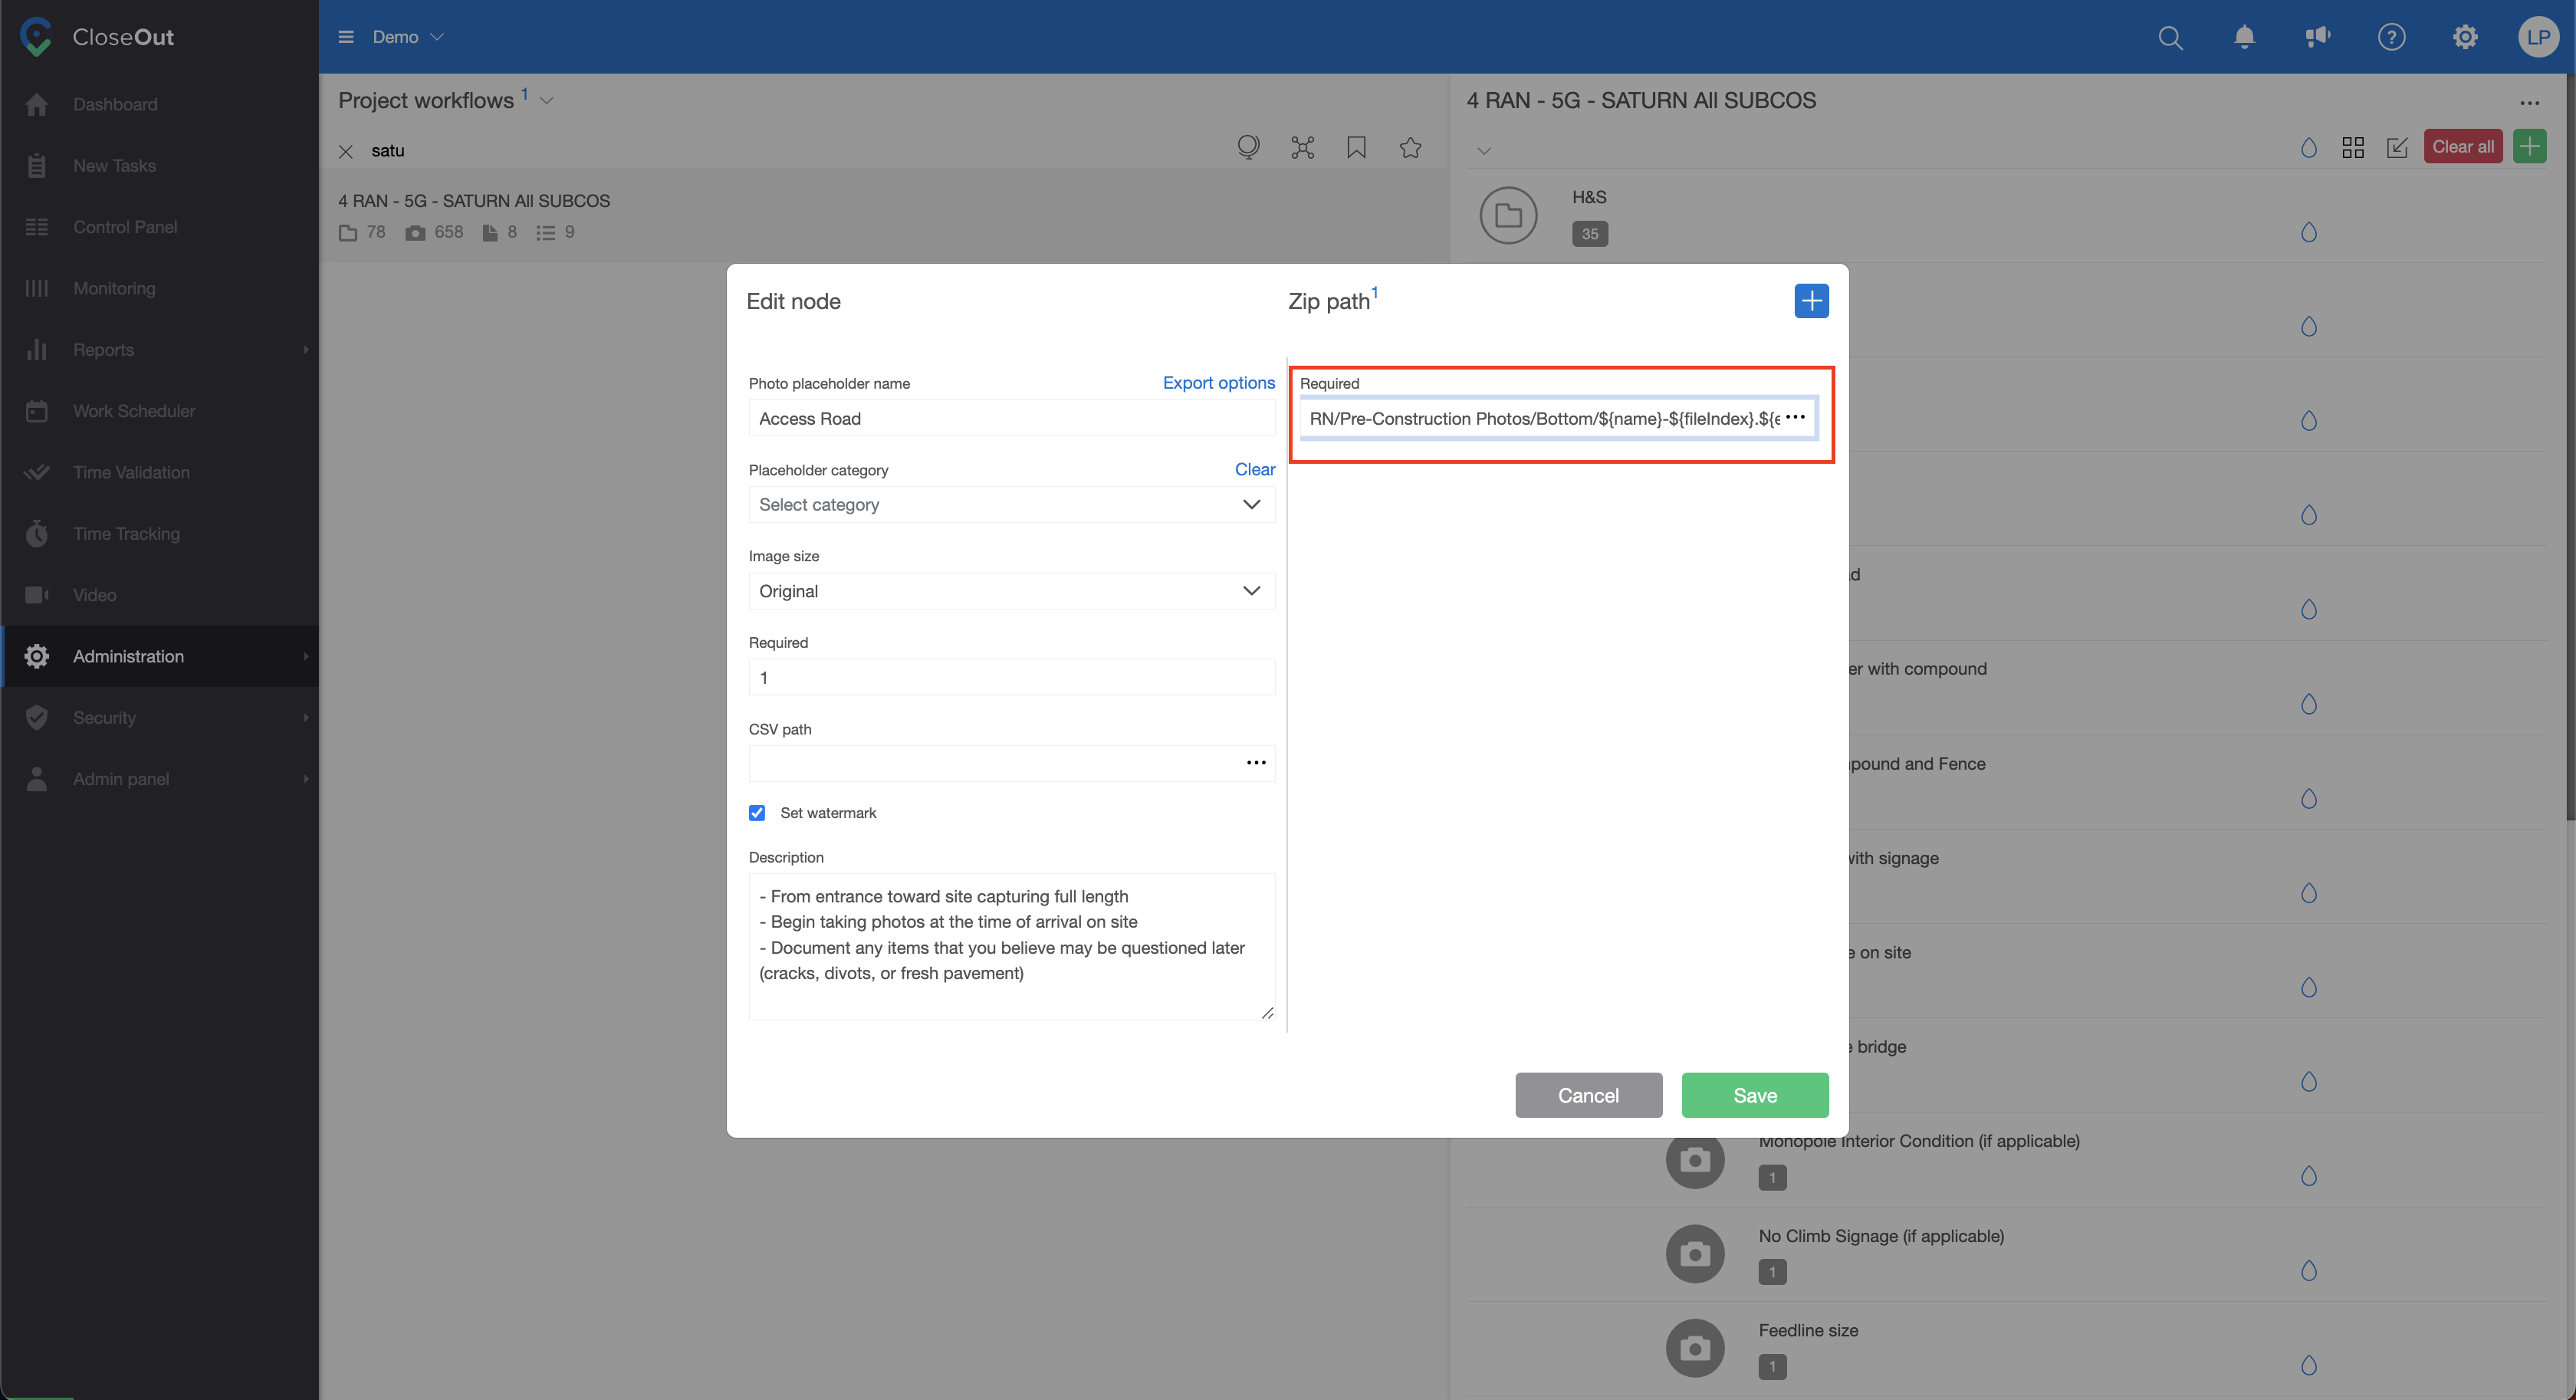
7765 5G Installation TELECOM SATURN/Pre-Construction Photos/Bottom/${name}-${localIndex}.${ext}
Project code and name/ folder name/ subfolder name/ placeholder name 1.jpg
If you wish, you can manually change the export's ZIP path but keep the same old folder structure for your field crew and back-office workers in their Control panel. Here is how to do it:
1. Go to Administration ⇒ Templates.
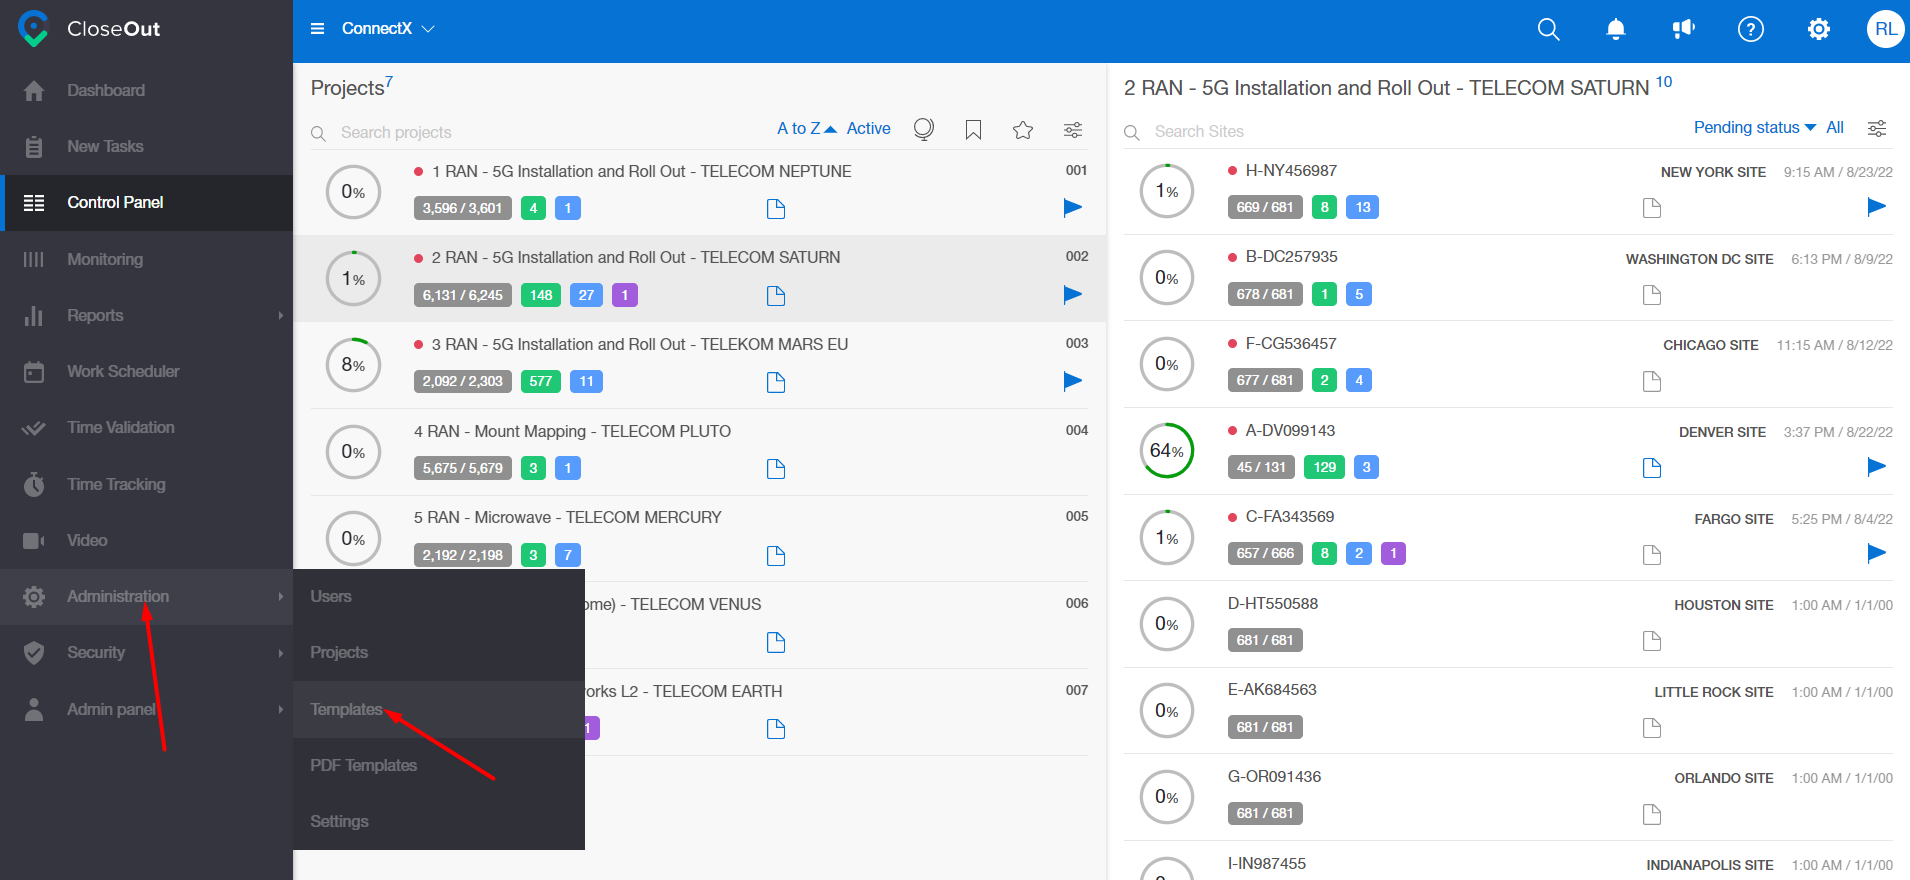
2. Select a project. On the right, you will see its folder structure.
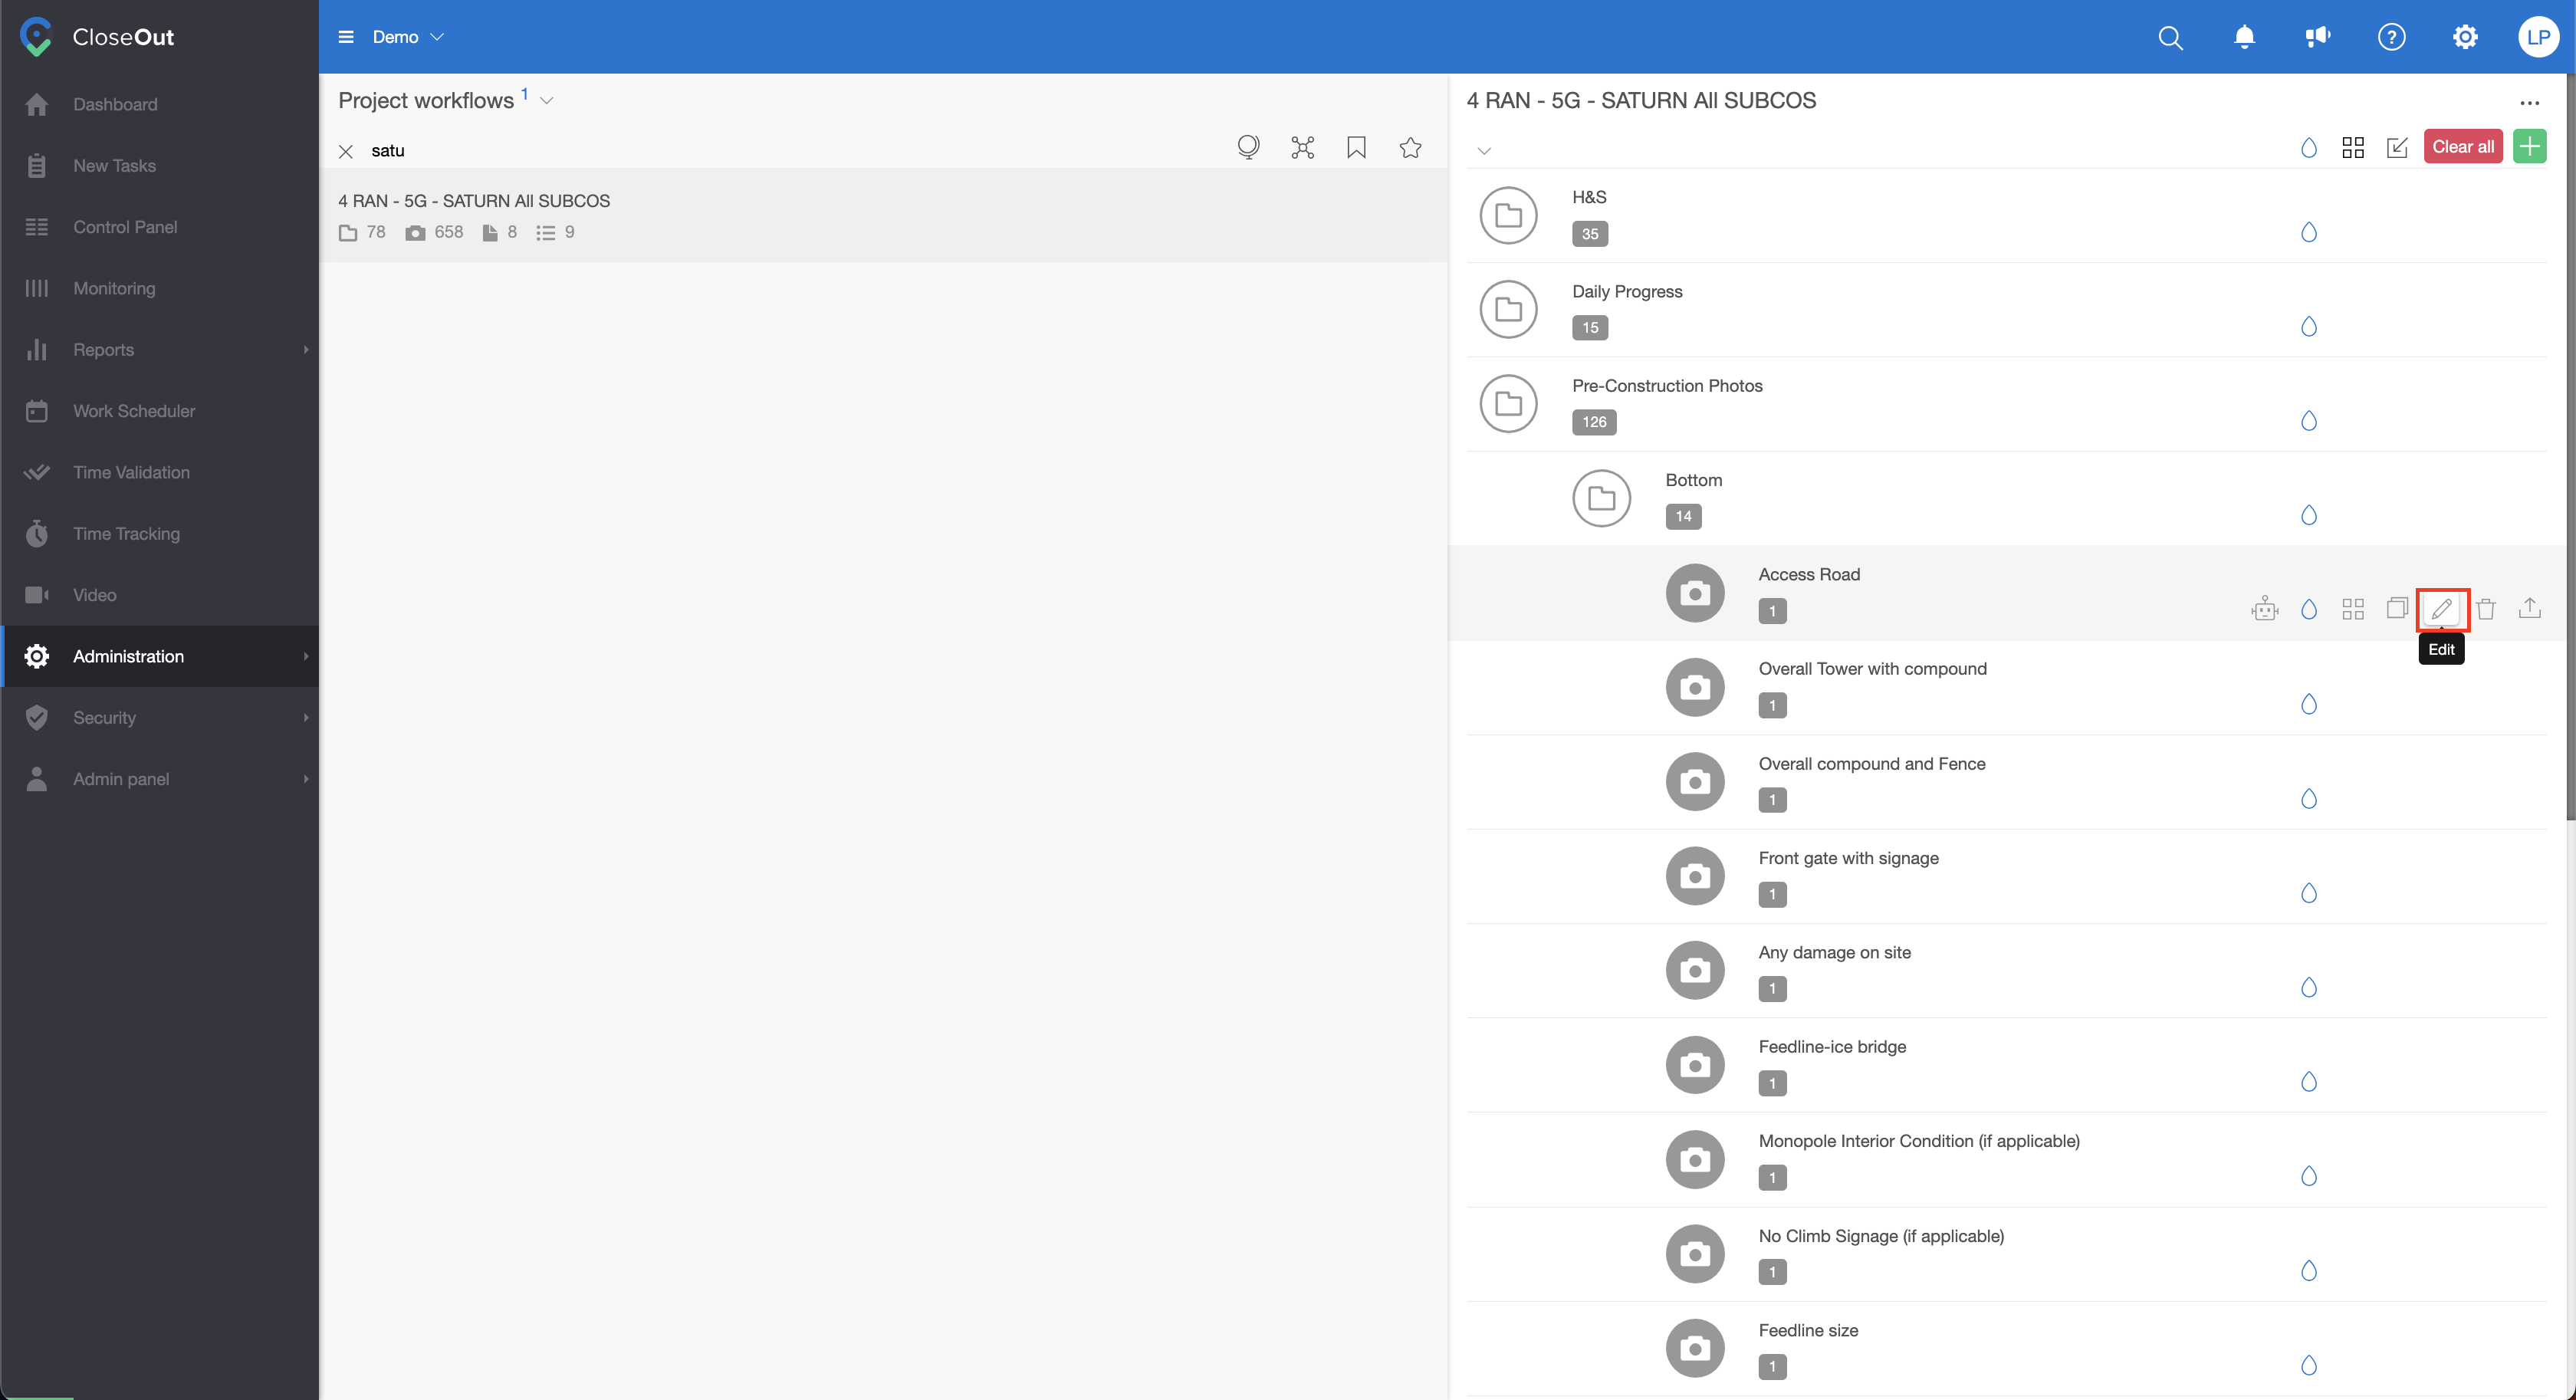
3. Go through the folder structure and find a specific photo placeholder you would like to have a different ZIP path in the export and click on the edit button.
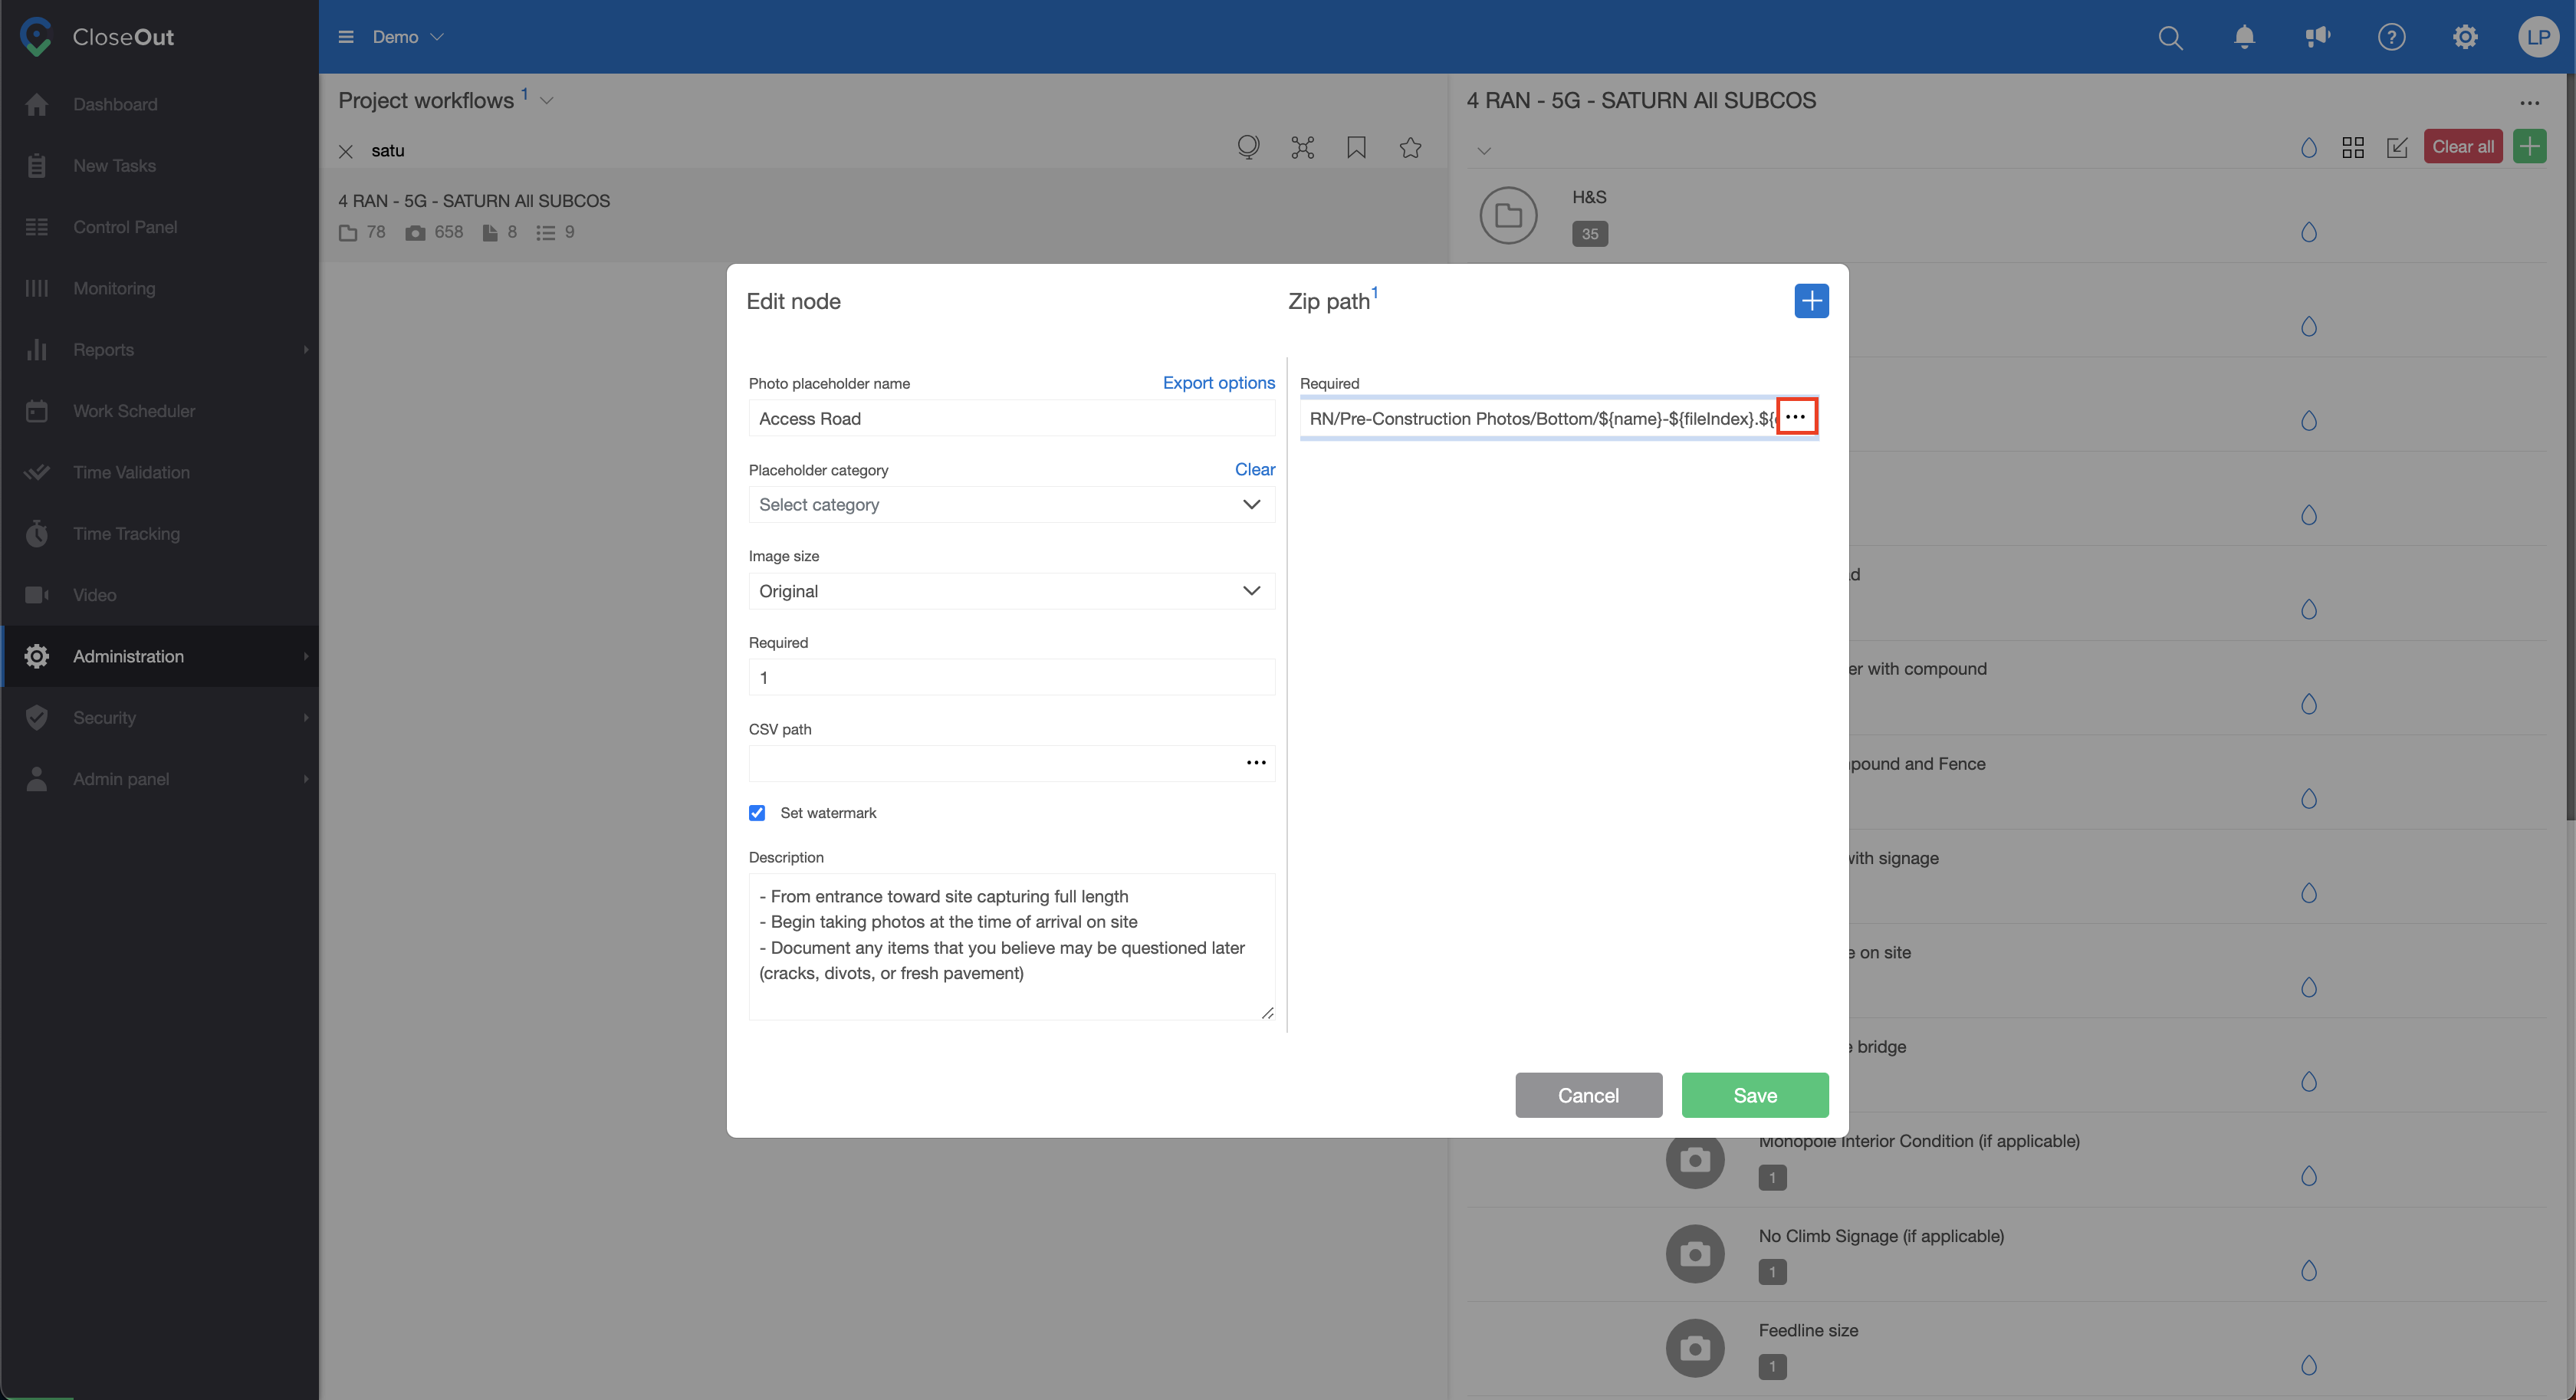
4. On the right side, there is a category ZIP path. In that field, you can type in any folder or subfolder name or even change the file name.
Important to know is that the slash sign / signifies the end of the folder name. After the last slash sign, the name of the file begins.
By simply typing the folder name in between slash signs, you can edit the existing folder name for the export or even create an additional folder that doesn't exist in your folder structure.
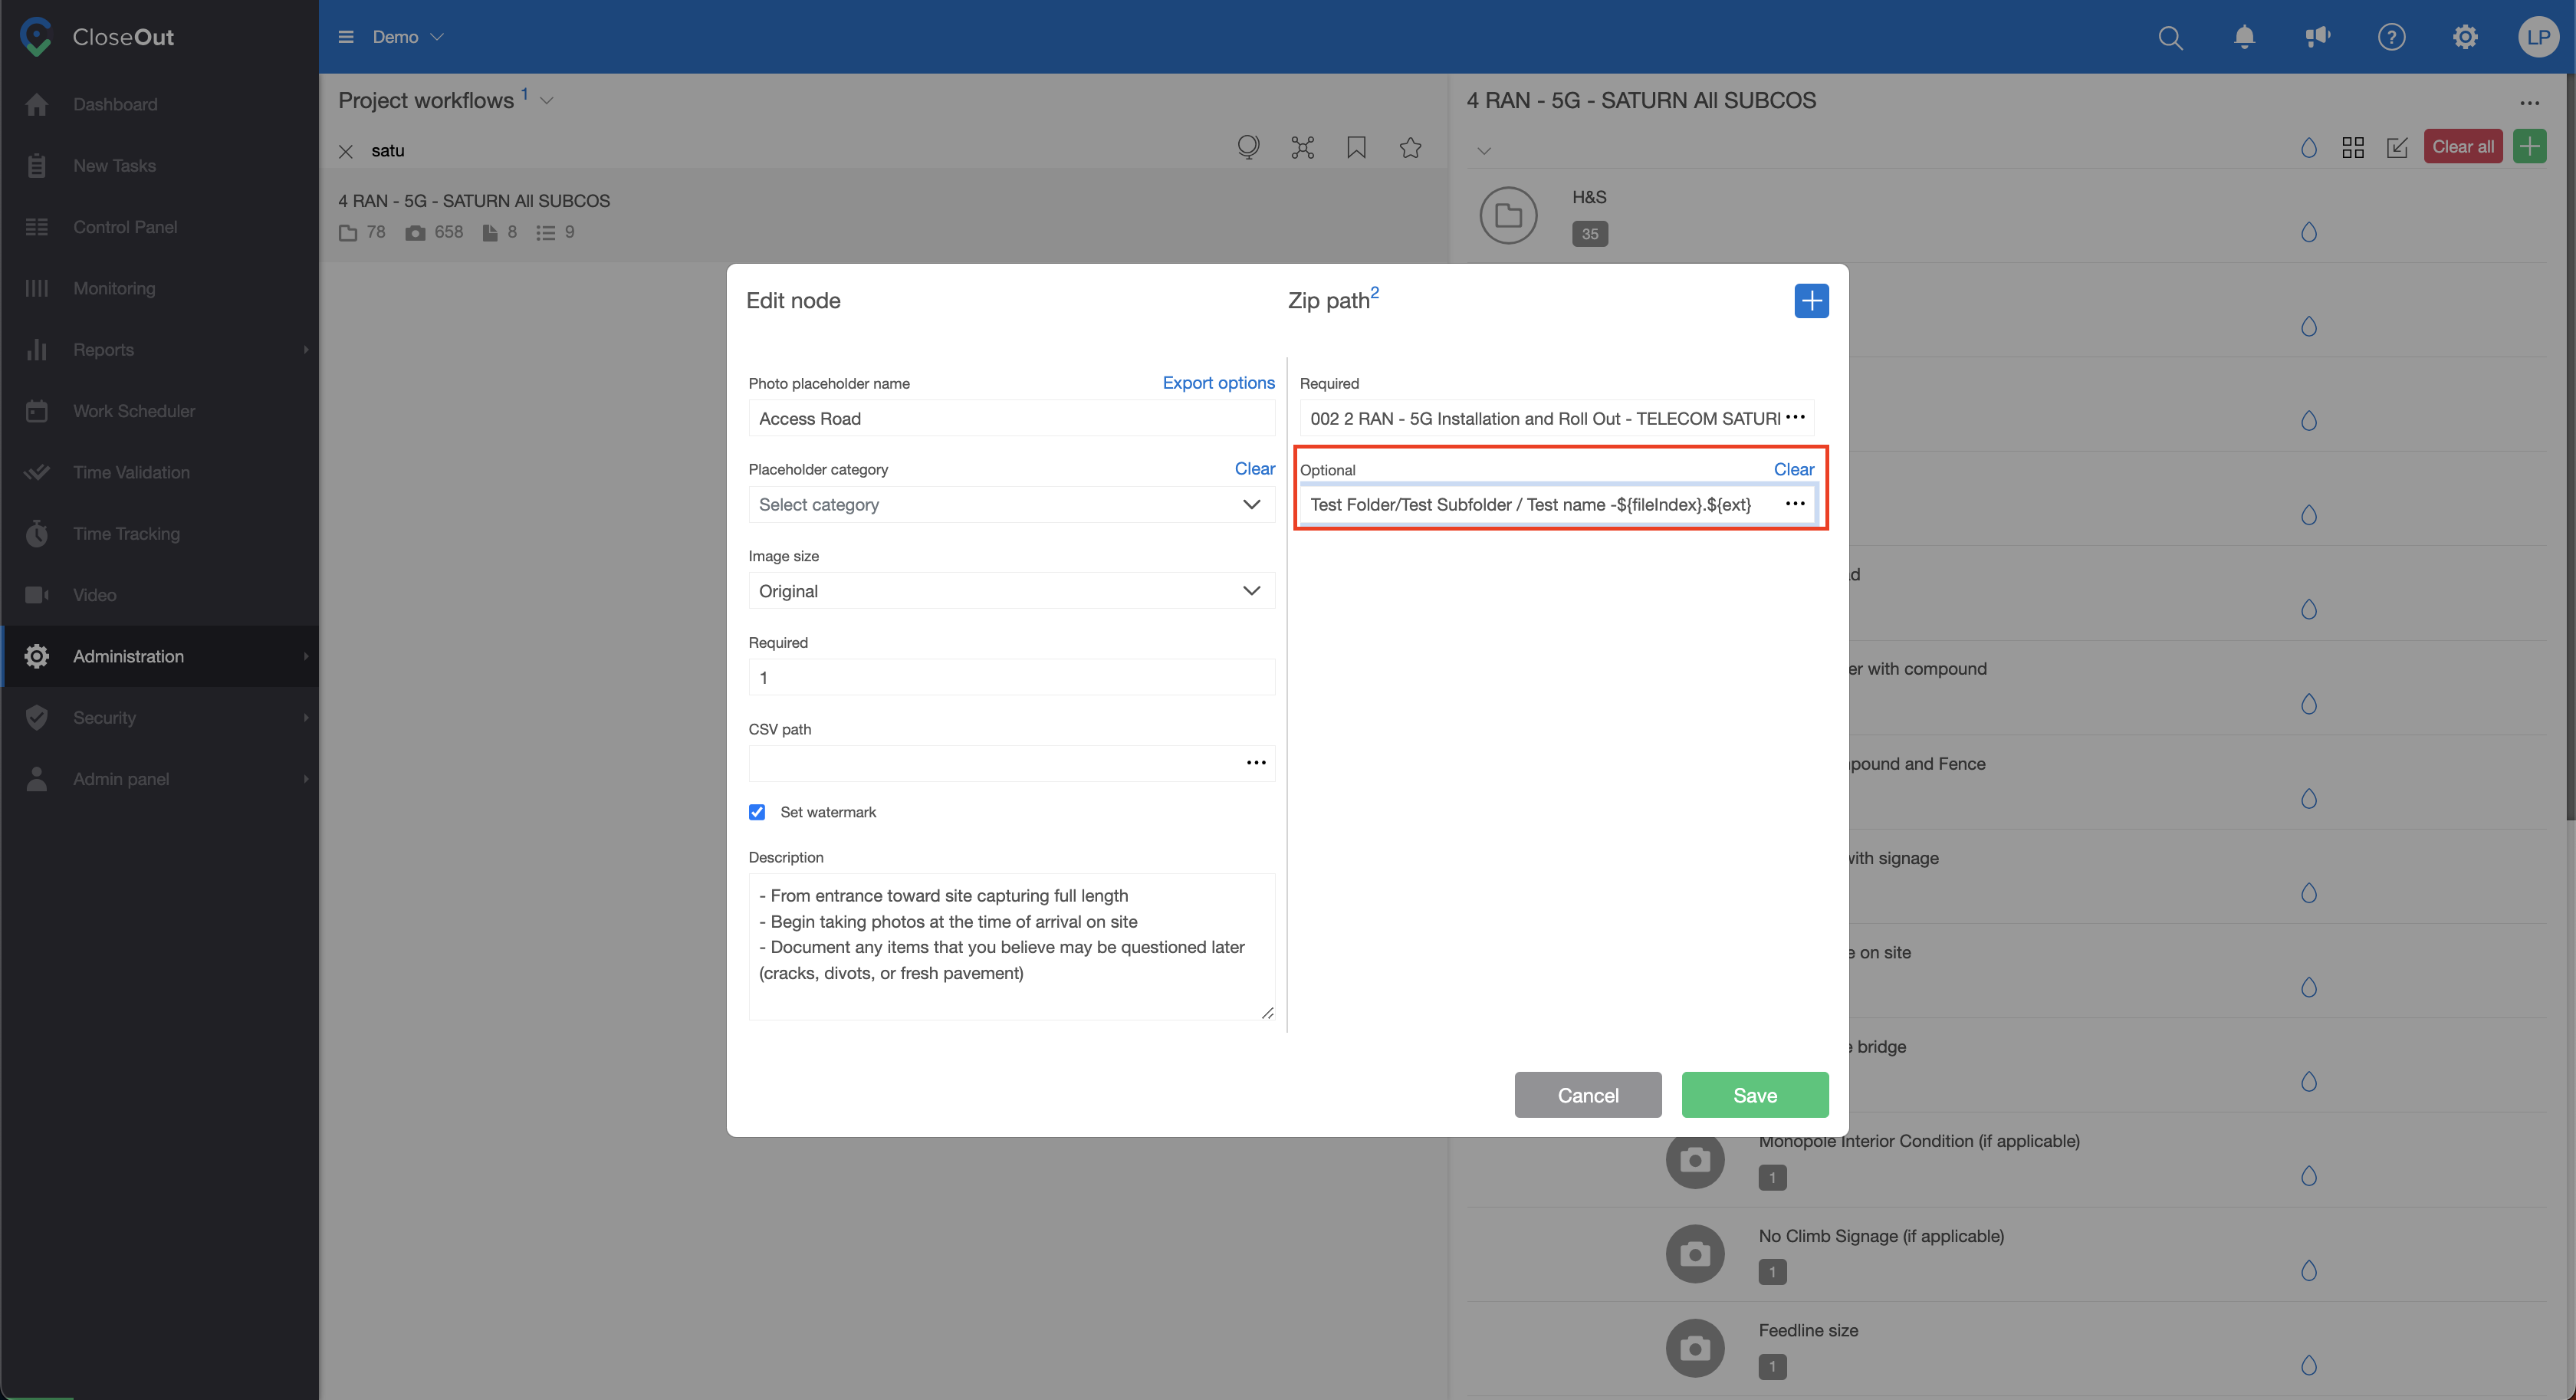
So, if you want to have a first folder named “Folder 1” and a subfolder named “Folder 2”, and inside, you want to have files named “Test File-1.jpg” and “Test File-2.jpg”, here is how you need to write it:
Folder 1/Folder 2/Test File-${localindex}.${ext}
where ${localindex} signifies the specific file number in the placeholder, and ${ext} represents the extension showing the file type, such as jpg, png, doc, pdf, xls, etc.
If you want to leave the file name as it is, keep the variable already in the predefined structure (${name}) and change only folder names by typing on your keyboard.
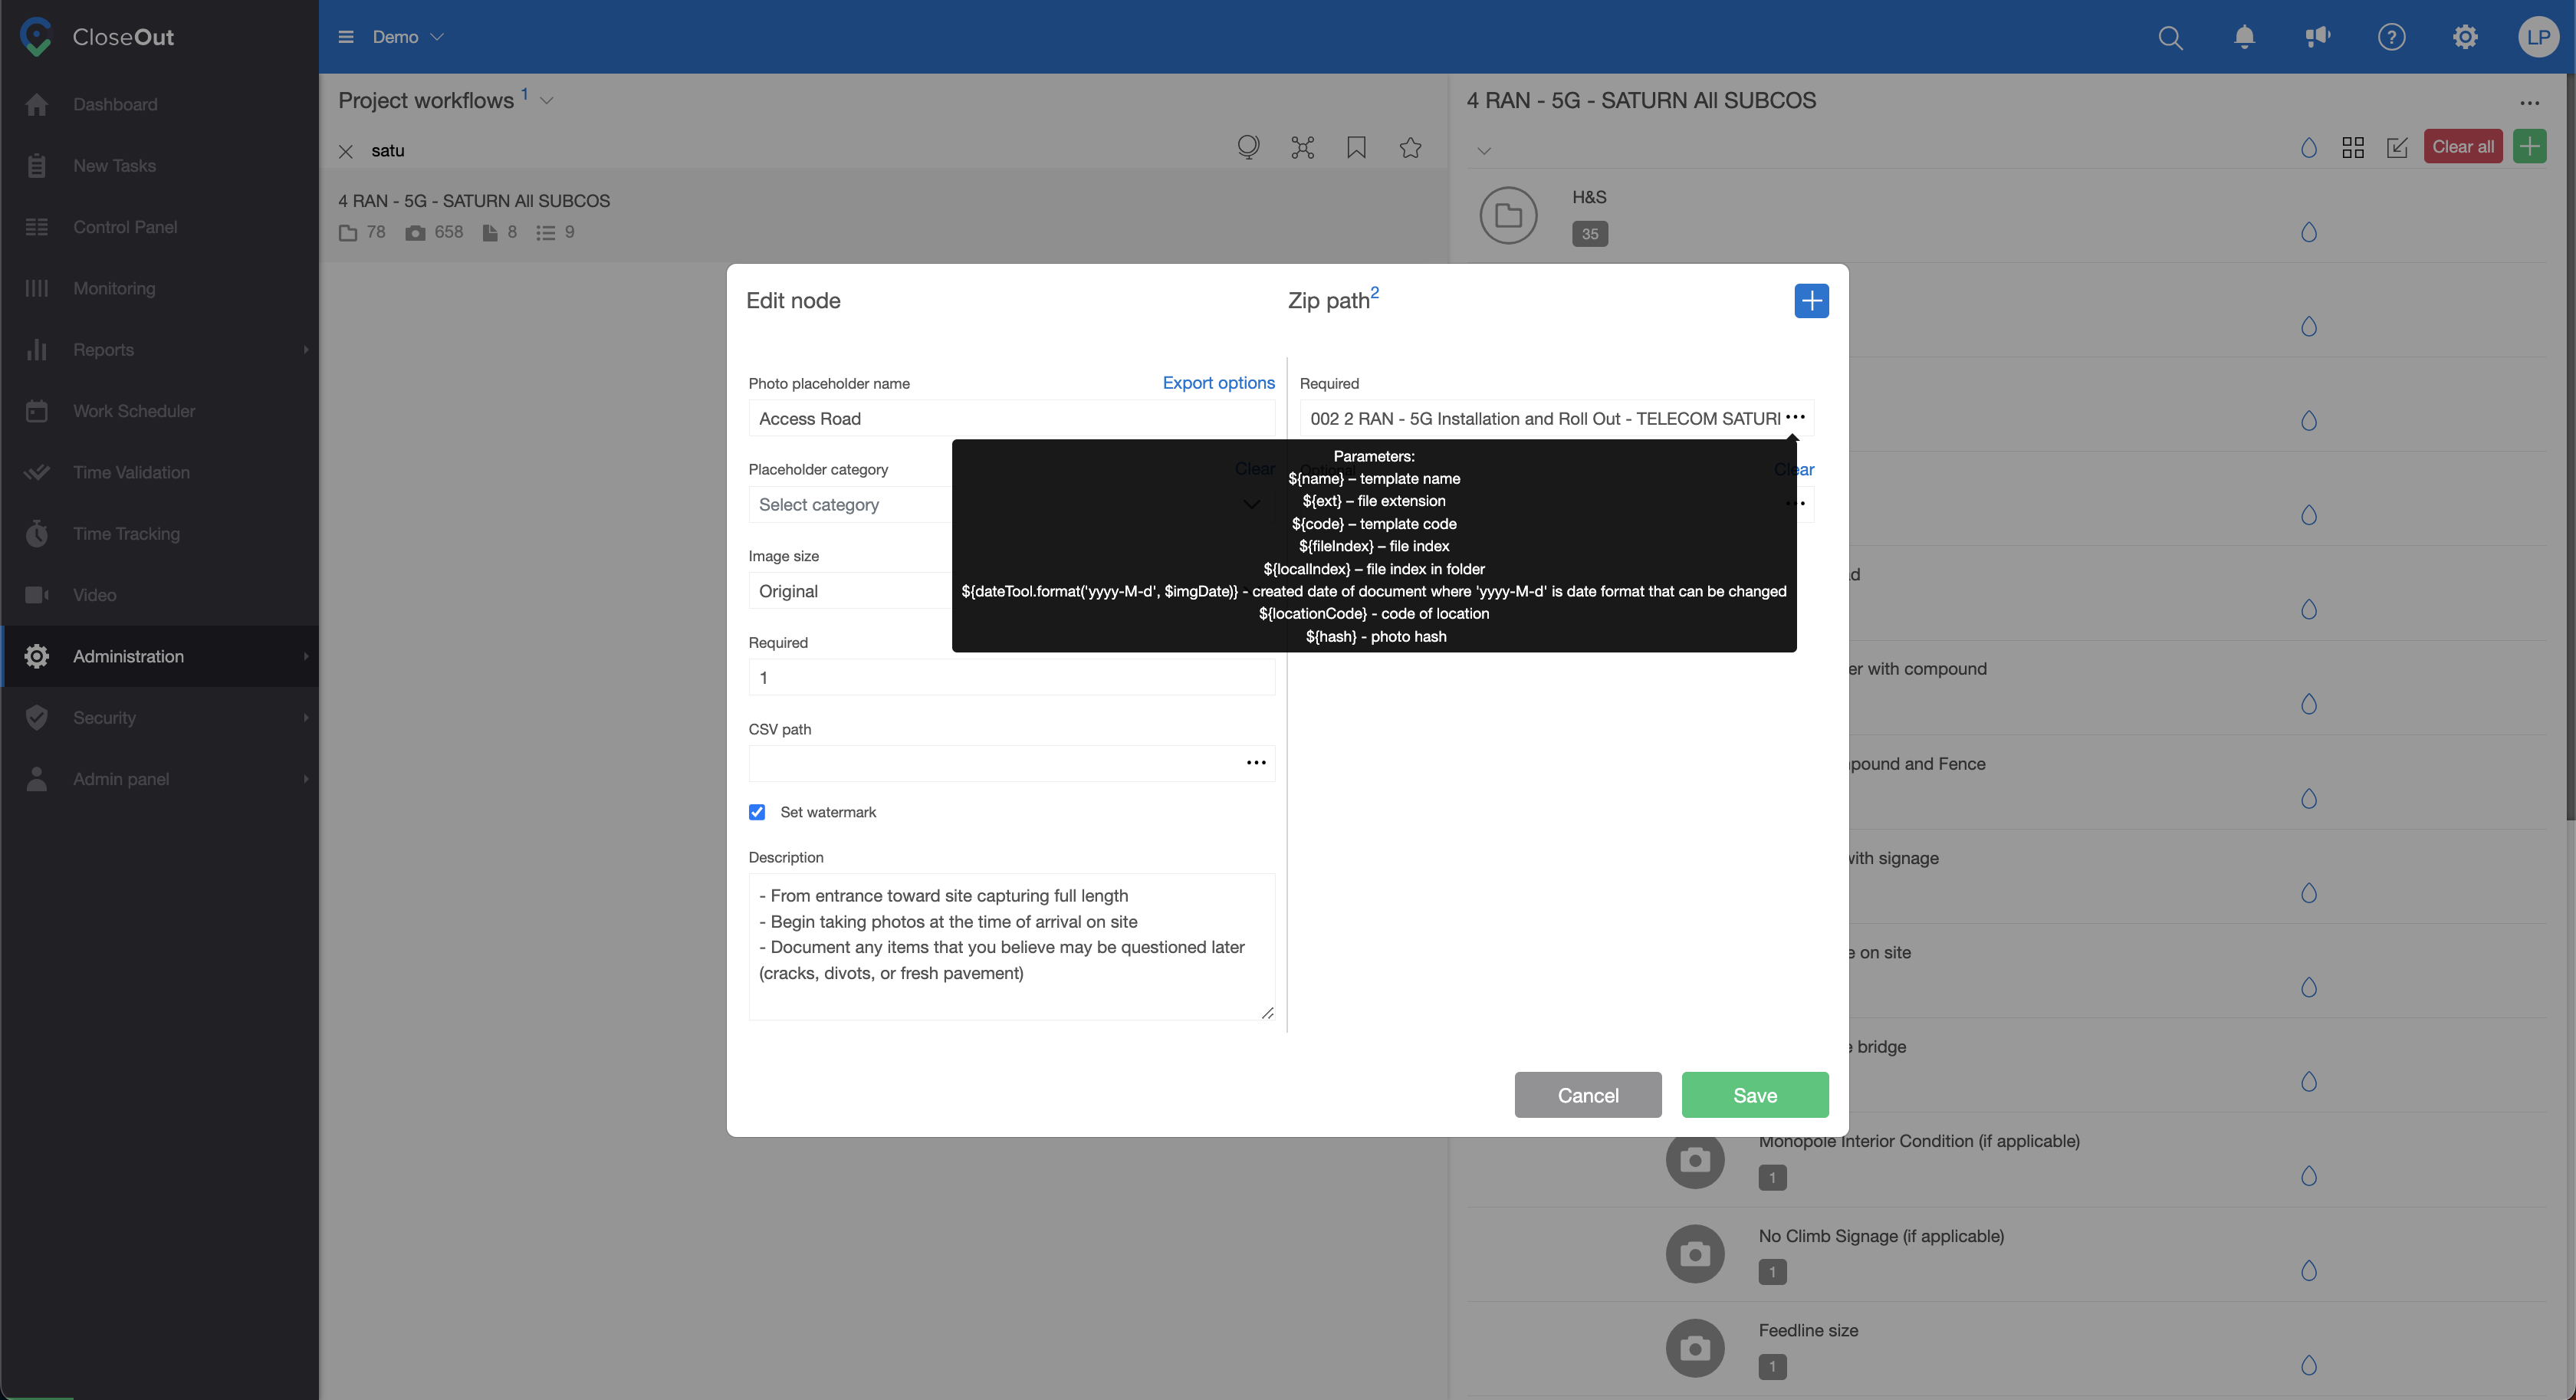
The list of variables that can be used can be found by clicking on the three dots, shown in the picture below.
Repeat this process for all the positions you want to change for the export.
This process needs to be done only once and will be applied to all the sites inside that project.
Double ZIP path
When you need one document in two different places in your close-out package (for example, one for the landlord and one for the carrier), there is no need to ask your field crews to take double pictures or your documentation department to copy them.
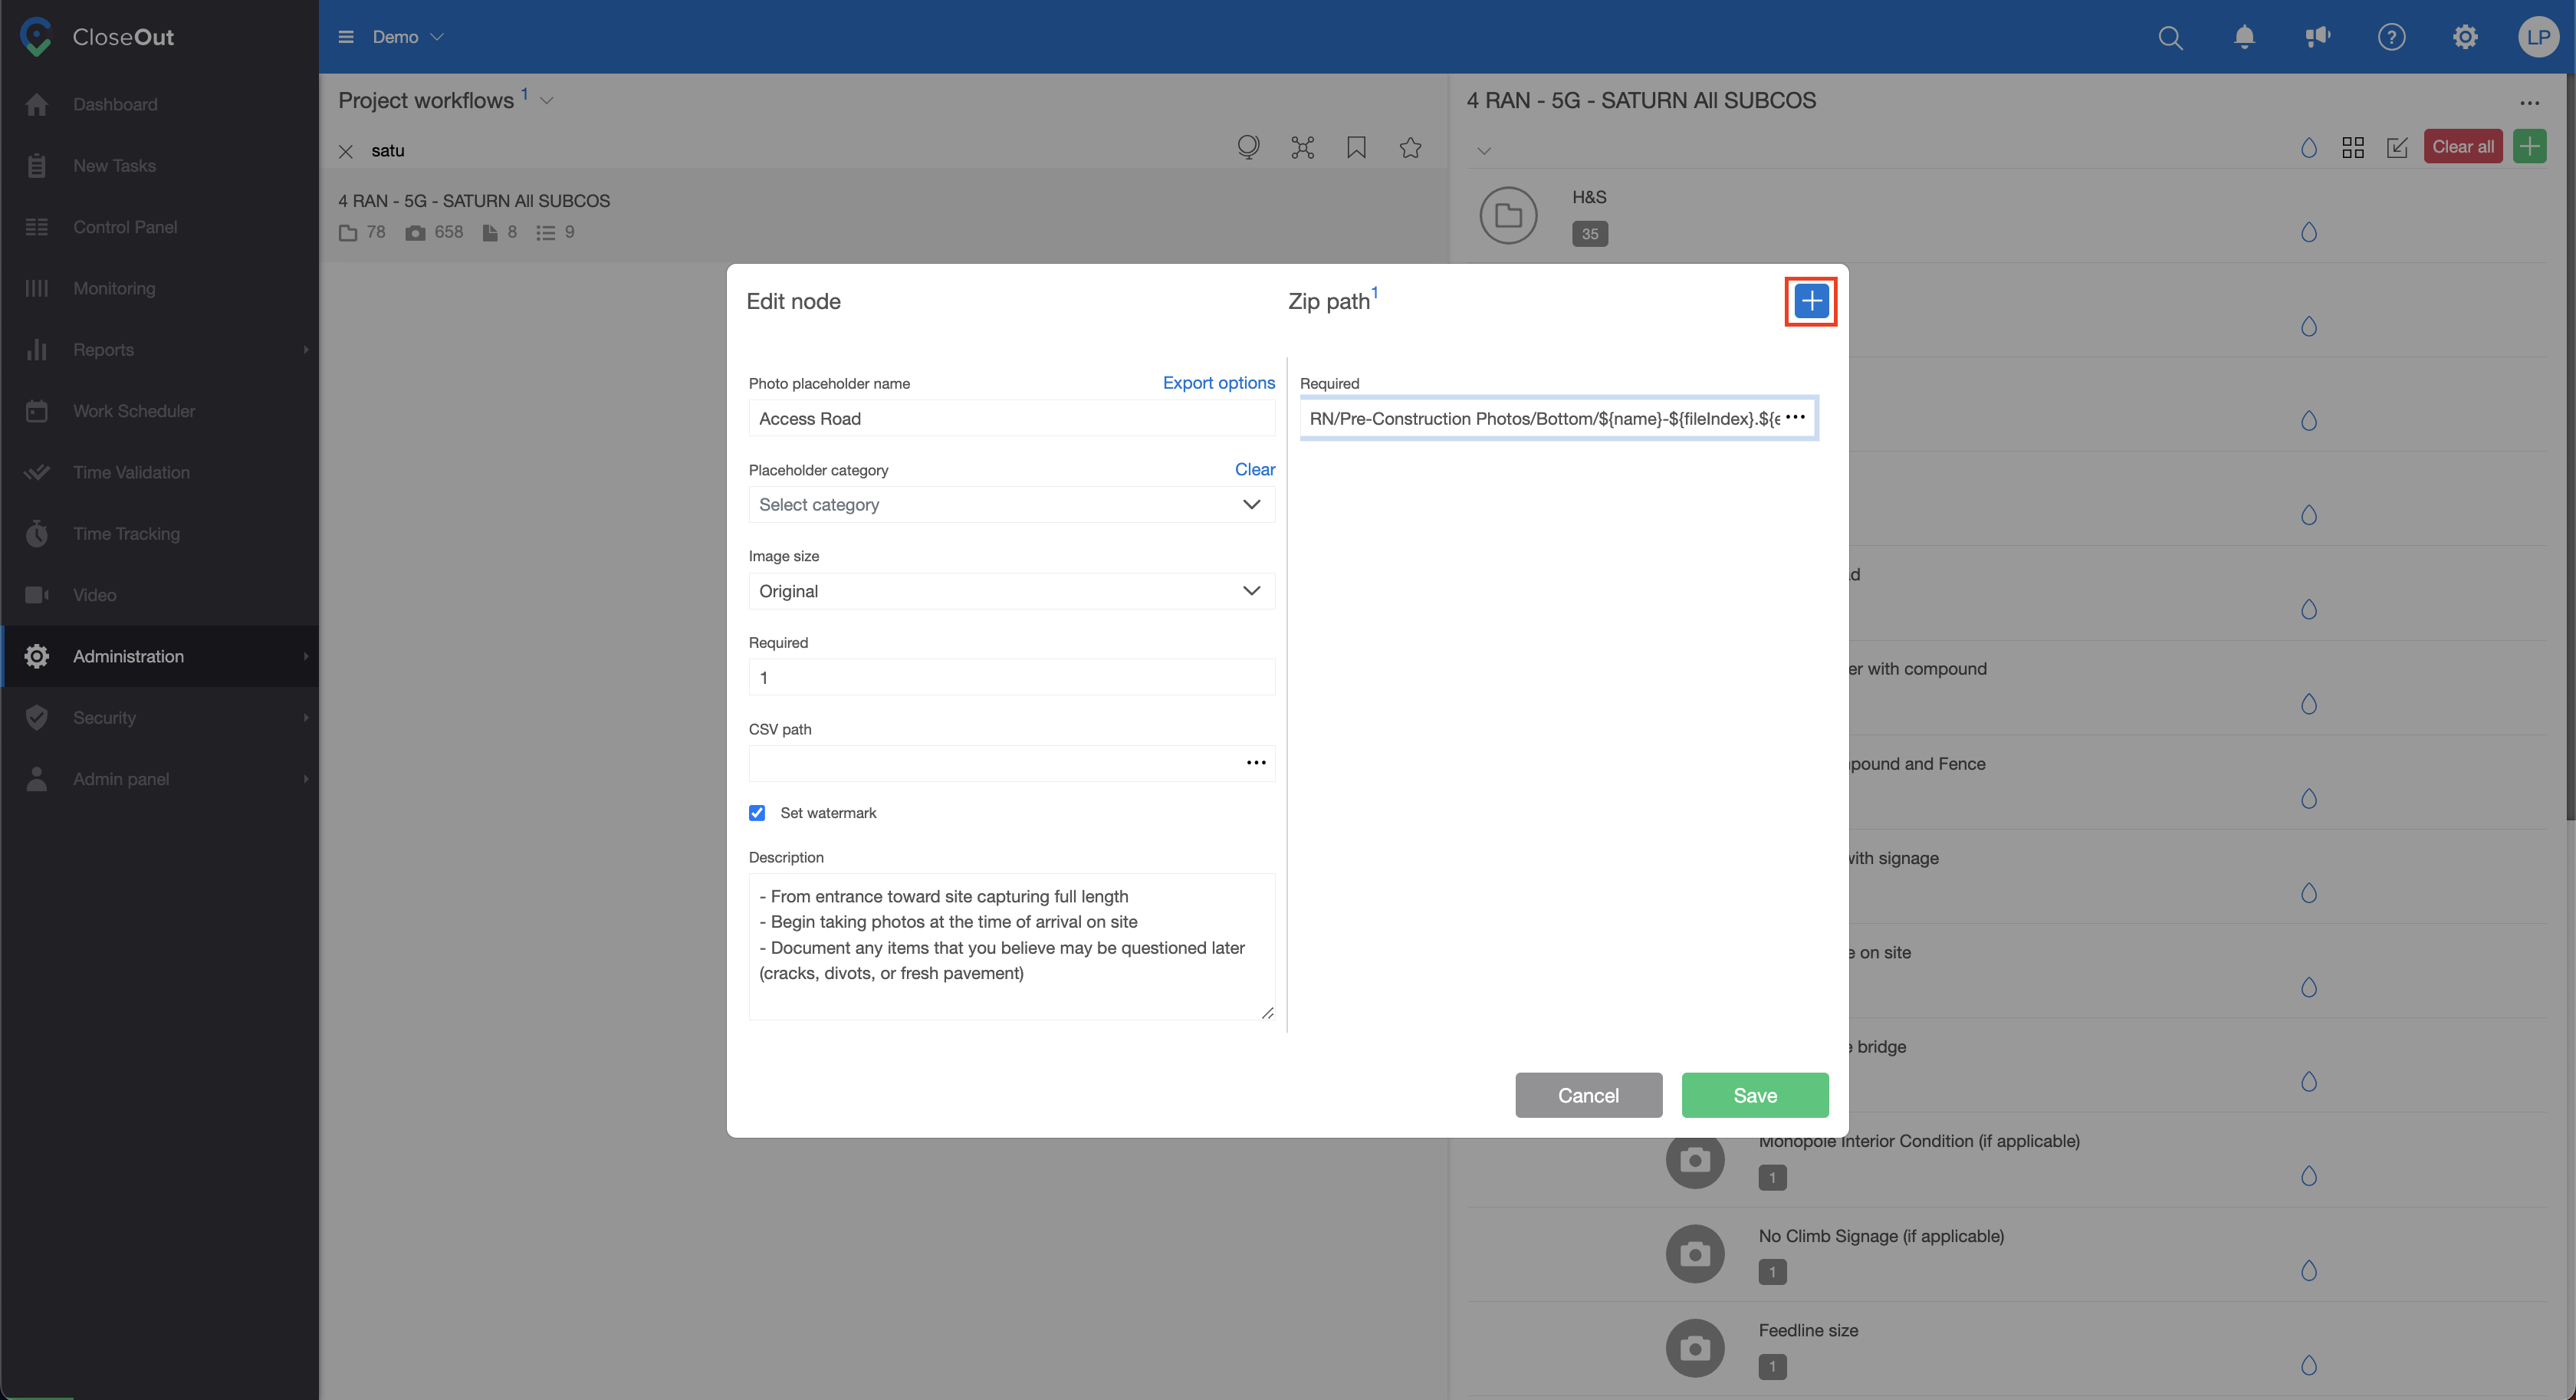
One document can have multiple ZIP paths and automatically be copied and put in the right folders. Here is how:
- Click Administration ⇒ Templates.
- Choose your project.
- In the folder structure, find the placeholder and click on the pencil icon to edit it.
- On the right side, there is the ZIP path category. Click on the + in the top right corner.
5. Type in the additional ZIP path/s. You can copy a previous one and paste it and alter it as needed.
