
By clicking Administration > Projects, a page on project administration is displayed. A list of projects that are available for you is displayed below. You can search for projects and edit them or create a new project.
Clicking the + button displays a modal window with the following fields displays:
- Project type - choose line infrastructure (mostly used in the PON industry and other projects that are linear by their site structure)
- Name - the name of the new project,
- Code - a code that represents a project, whatever you choose. Code can be in numbers or letters,
- Country - list of the countries where your project is located. Begin by typing the first letters of the country. If you choose the United States or Canada, you will get the option to choose states also.
- Description - a short description of the project (this is optional),
- PDF Template - template for the documentation that is exported in PDF format,
- Choose Tag - set a tag that will help you find your new project. You can select it from the list of already created tags or create a new one. A tag can be a single word or multiple words separated by a hyphen. In the search field start typing a new tag name and click "add tag".
- Once you enter valid data, the Save button becomes active, and you can create your project.

The list of existing projects displays information about the project on the right side. You can search for the specific project, turn on the country, business line, tag, or status filters, choose if you want to see only Line infrastructure projects, and sort projects by a different order.
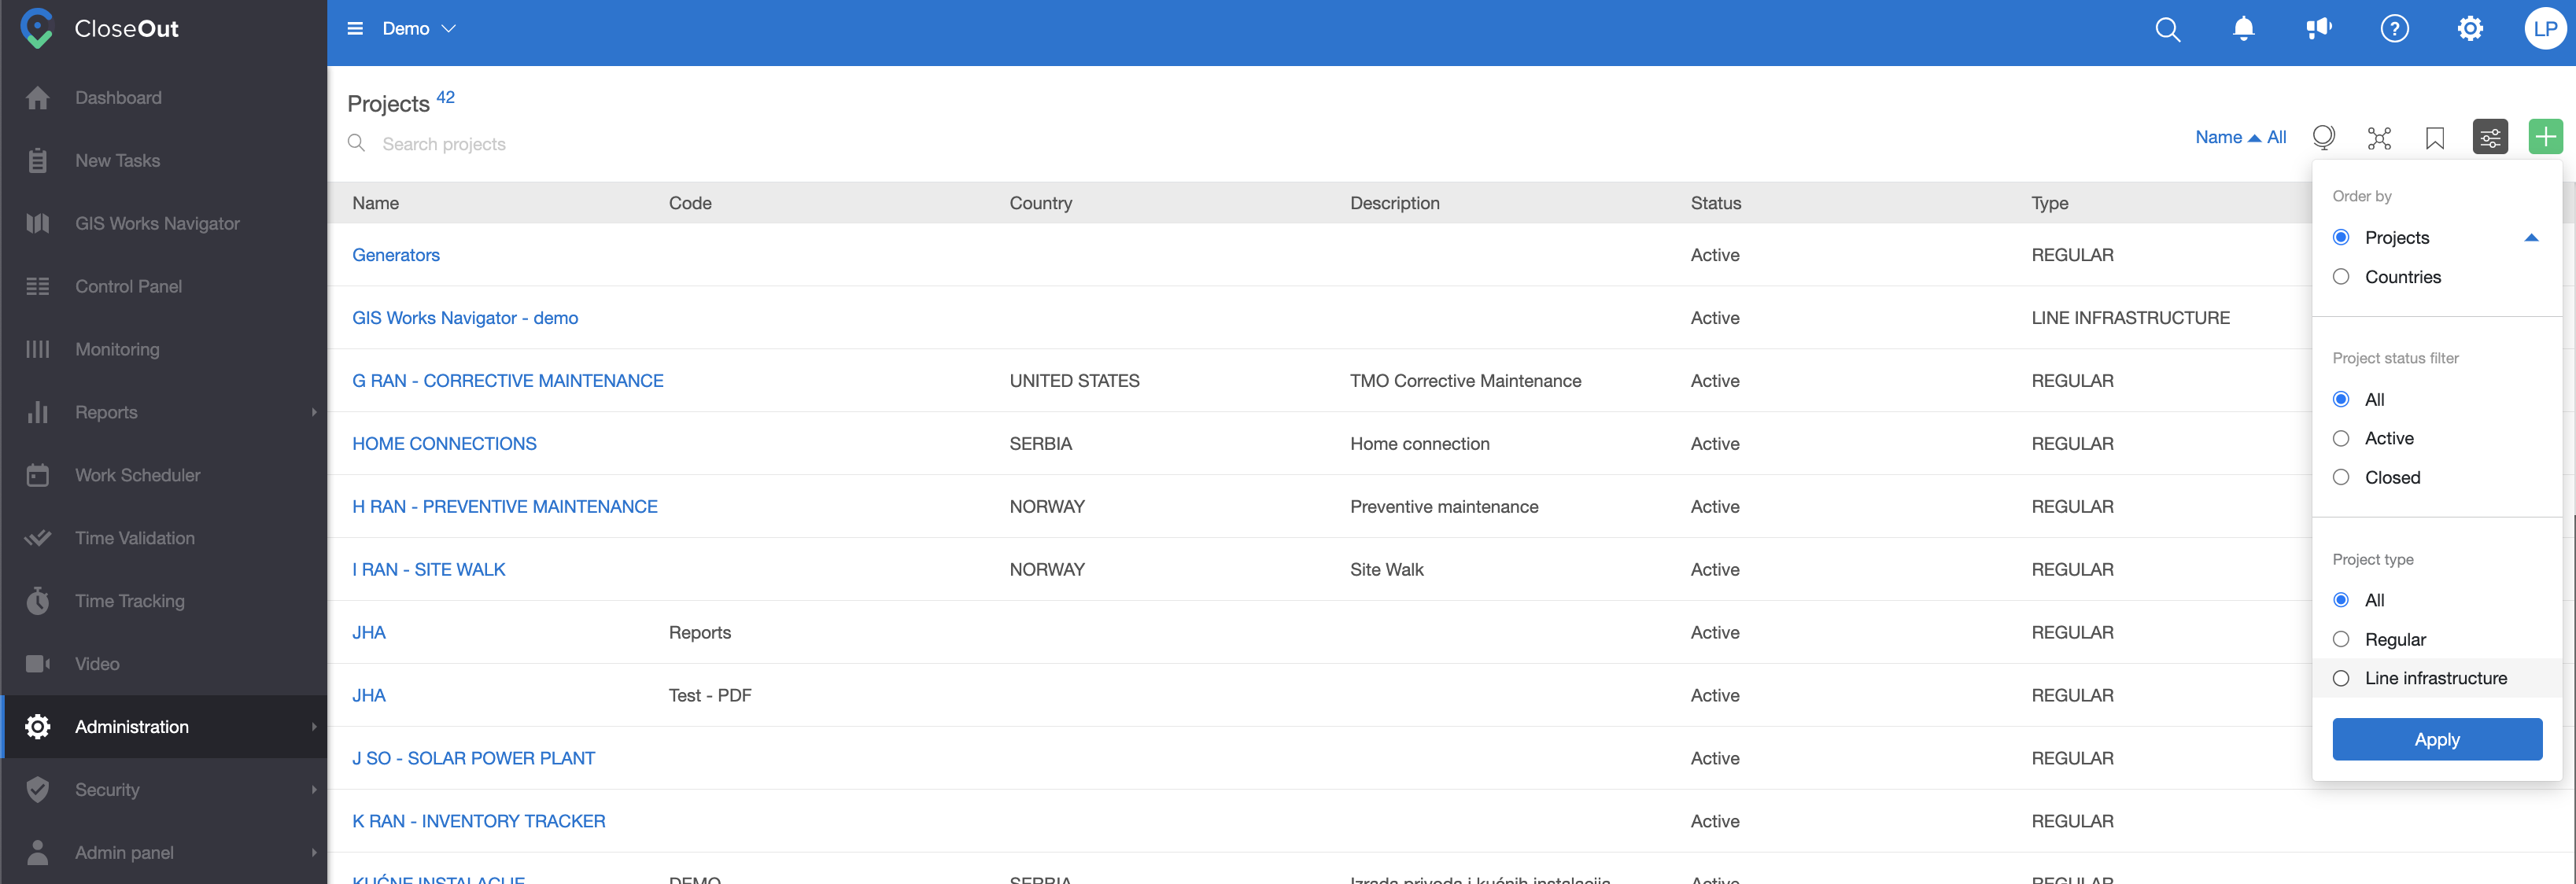
If you hover over a project on the far right, you will have the possibility to edit a project workflow, see the status details (when it was created and by whom), see the country and tags if they are added, edit the project, and delete it.

Note:
You can't delete projects that have sites unless you are an Admin.
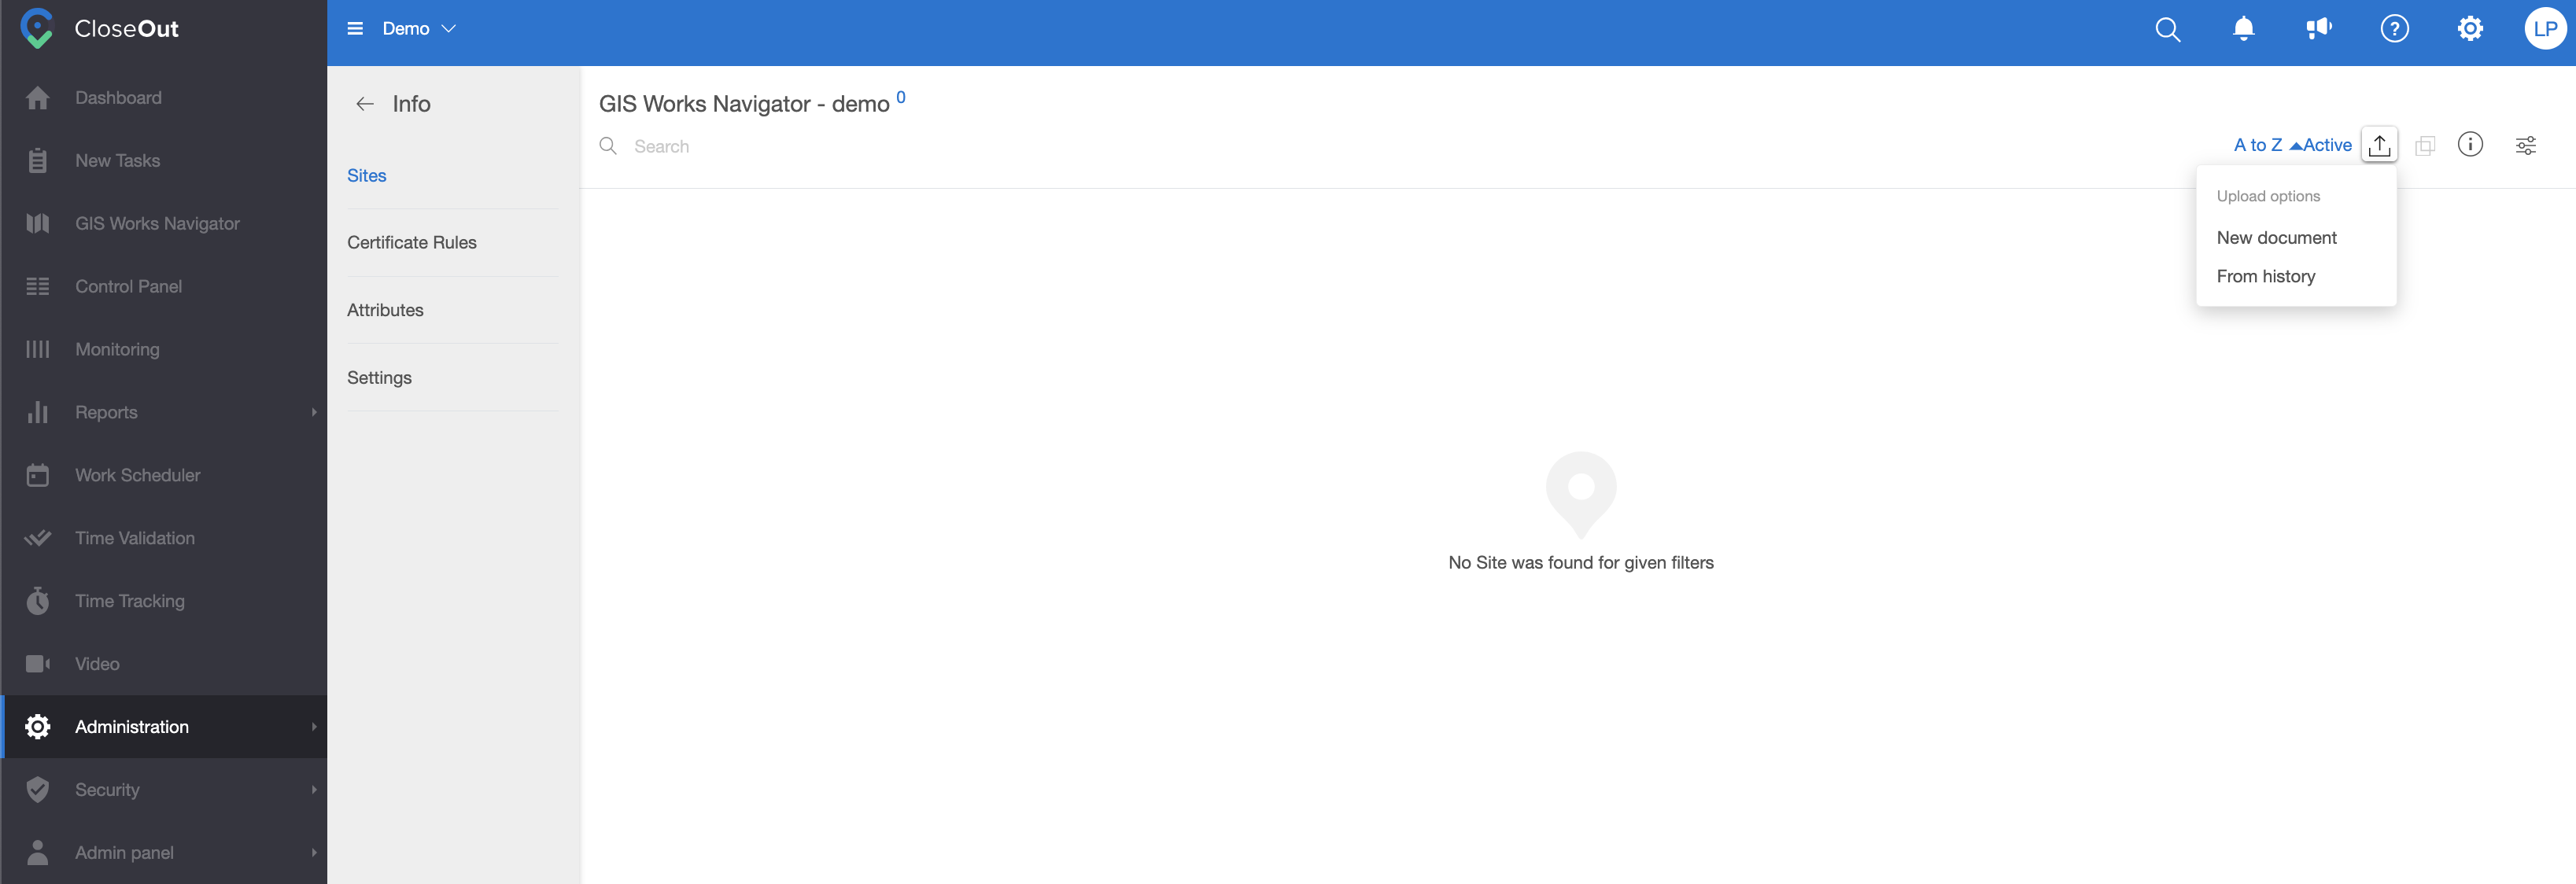
If you click on a specific project, you will be able to set different parameters for the projects. Create sites, set certificate rules, add additional attributes, and set watermark elements.
In the top right menu, clicking on the + icon will allow you to:
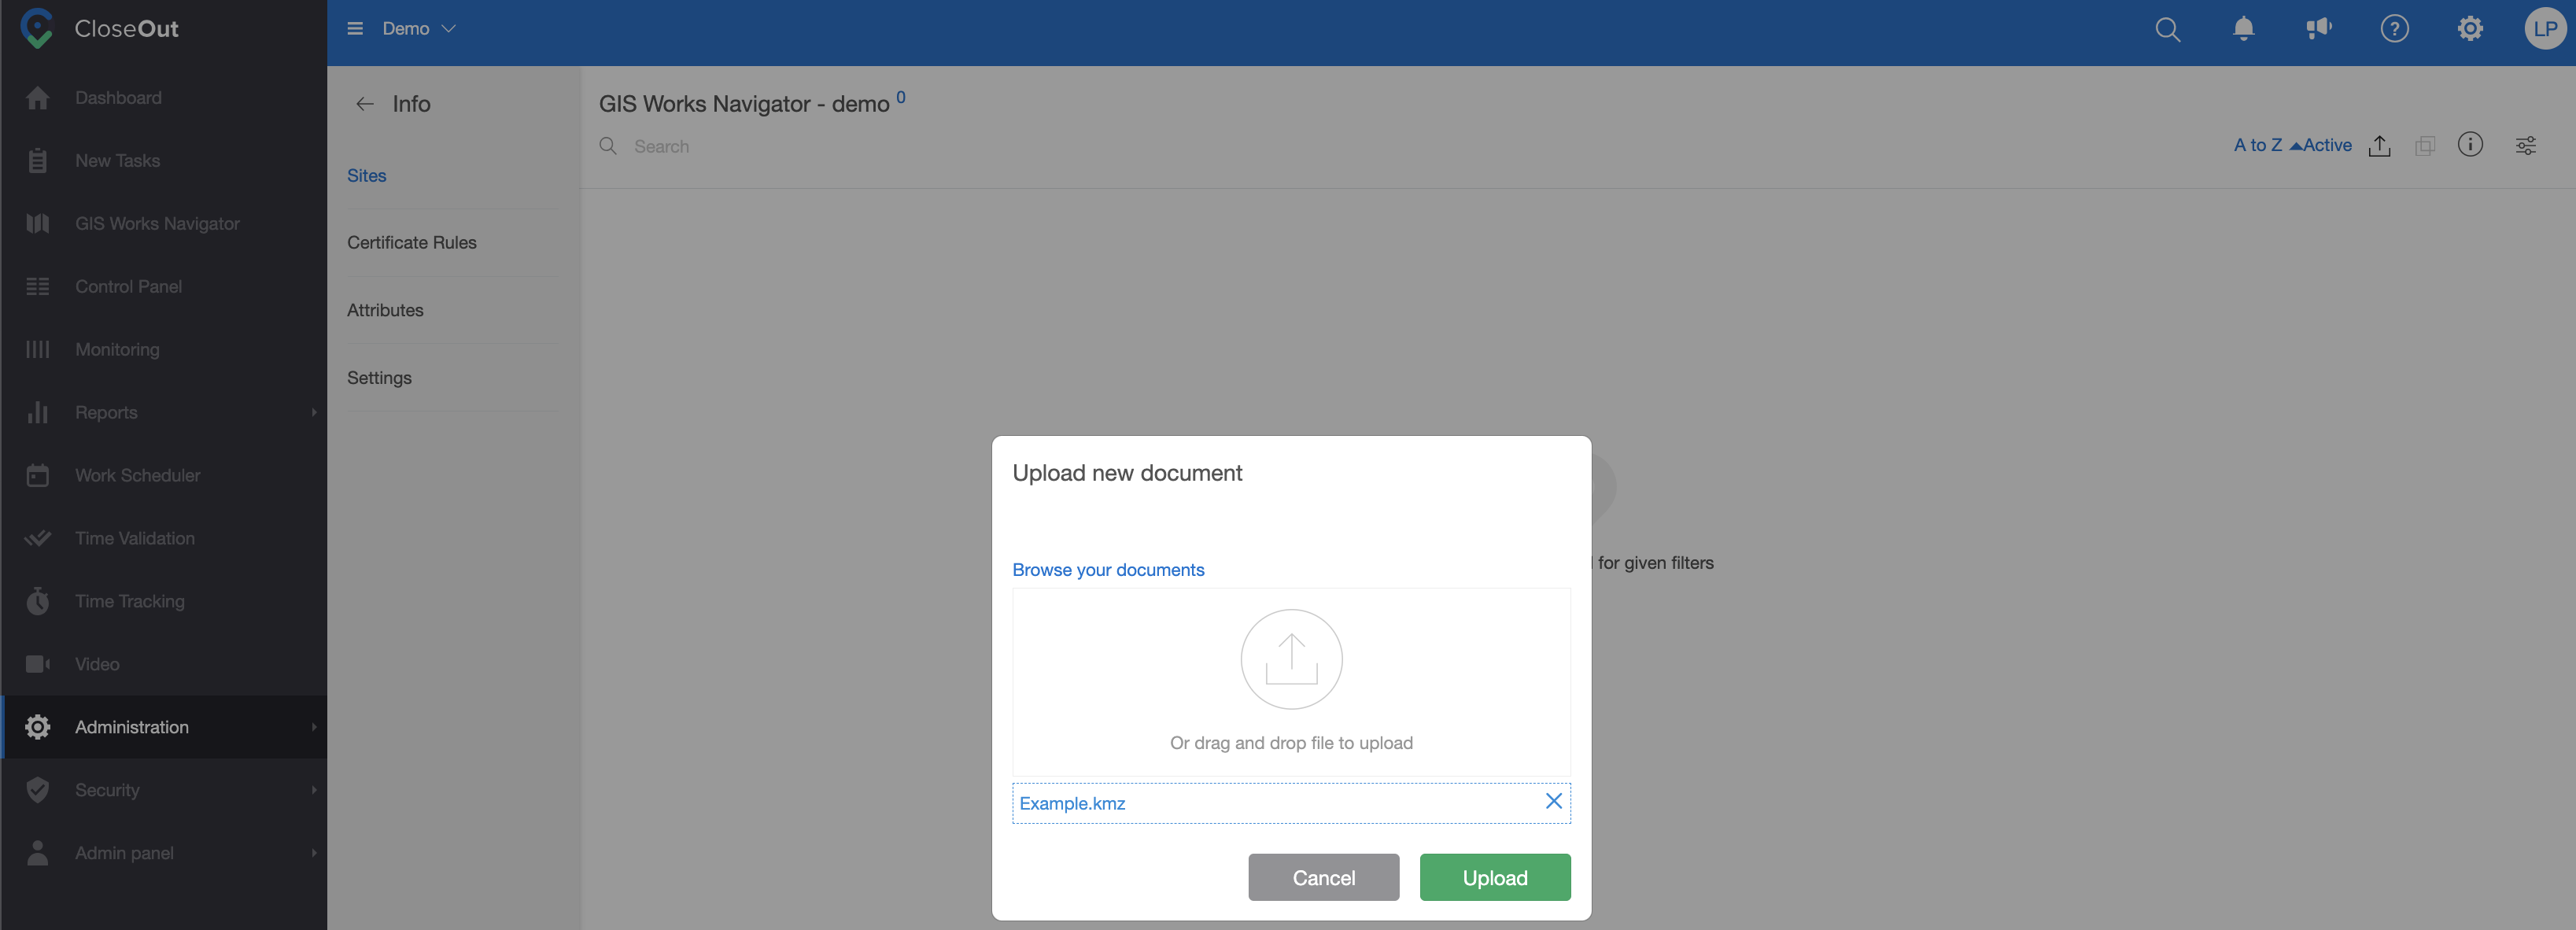
- Import sites for projects from KMZ or KML file - Clicking the import button displays a modal window from which you can import a file.
- Merge multiple sites into one
- Delete site or marked sites - Click this button to delete an existing site.
- View the information about the project
- Turn on the filters (the icon becomes blue) - active, closed, suspended, or empty.
In order to create sites, you will be able to upload a KMZ or KML file with the route of your project divided by the smaller portions that will represent sites in your CloseOut project.
To upload sites from a KMZ or KML file, use the following steps:
- Click the import button and select whether you want to upload a new or already used file. You can either upload a file from your computer or by drag-and-drop.
- On the left side, you will see the list of elements from your KMZ or KML file representing parts of the route.
- Select all similar sites or line segments
- Add code, and active period (if needed), and select the workflow you want associated with that site or group of sites (for example: manholes, trenching etc.)
Hint: Prepare Before Importing
- Define and preload your workflows and quality checkpoints before importing your KML/KMZ file.
- CloseOut automatically names elements based on the selected name-bearing attribute in your file. If set correctly (e.g. site name), all segments and points will be auto named on import, eliminating manual typing and speeding up project creation.
- Line elements (cabling, trenching) and point elements (manholes, cabinets) can be created in seconds or minutes, even for large files, while keeping full control of the process.
- Preloaded workflows ensure all imported elements are immediately structured and ready for use.
👉 Need help preparing your KML/KMZ file? Contact our Customer Success team.
- Click Save, and you will be presented with two options:
- Save as one site (combines all selected KML/KMZ elements into a single site)
- Save as separate sites (creates an individual site for each selected element)

- Continue with the creation of other sites.
- In case you want to come back later and add more sites to this project, you can reuse the same file, by choosing a “file from history” when clicking on the “upload" icon.
Attribute Visibility (May 25th, 2026)
- CloseOut now displays attributes from KMZ, KML, DWG, DXF, and SHP files during import and after site creation.
- All attributes are fully visible in the GIS Navigator across web, mobile, and tablet, giving both planners and field teams instant access to structured data.
- During import, you can preview every element along with its attributes in a clear, organized view. In the field, technicians can tap any segment to instantly see all relevant information—no searching or delays.
- Combined with real-time AI quality checks, this ensures faster execution, better accuracy, and fewer errors on site.
All your data. Visible. Accessible. Ready to use.
Watch the feature in action in the video below.