
By clicking Administration > Projects, a page on project administration is displayed. A list of projects that are available for you is displayed below. You can search for projects and edit them or create a new project.
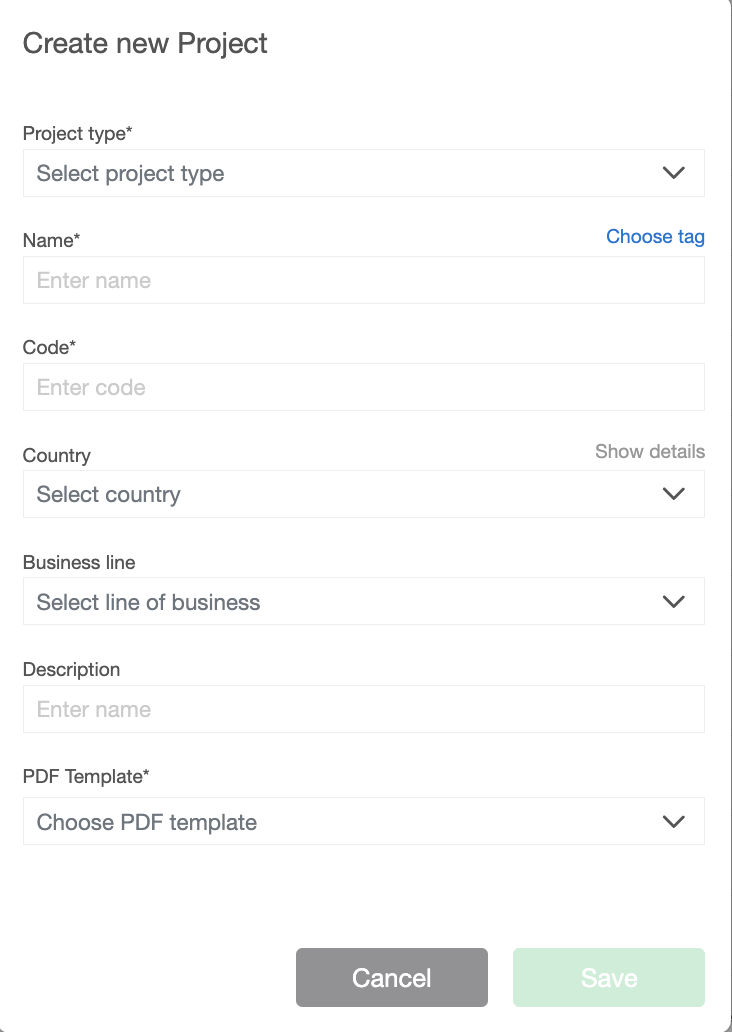
Clicking the + button displays a modal window with the following fields displays:
- Project type - choose between two project types: regular (mostly used in the RAN industry - where one site is at one location, such as a tower) or line infrastructure (mostly used in the Fiber industry and other projects that are linear by their site structure)
- Name - the name of the new project,
- Code - a code that represents a project, whatever you choose. Code can be in numbers or letters,
- Country - list of the countries where your project is located. Begin by typing the first letters of the country. If you choose the United States or Canada, you will get the option to choose states also.
- Description - a short description of the project (this is optional),
- PDF Template - template for the documentation that is exported in PDF format,
- Choose Tag - set a tag that will help you find your new project. You can select it from the list of already created tags, or create a new one. A tag can be a single word or multiple words separated by a hyphen. In the search field start typing a new tag name, and click "add tag".
- Once you enter valid data, the Save button becomes active, and you can create your project.
The list of existing projects displays information about the project on the right side. You can search for the specific project, turn on the country tag or status filters, and sort projects by a different order.
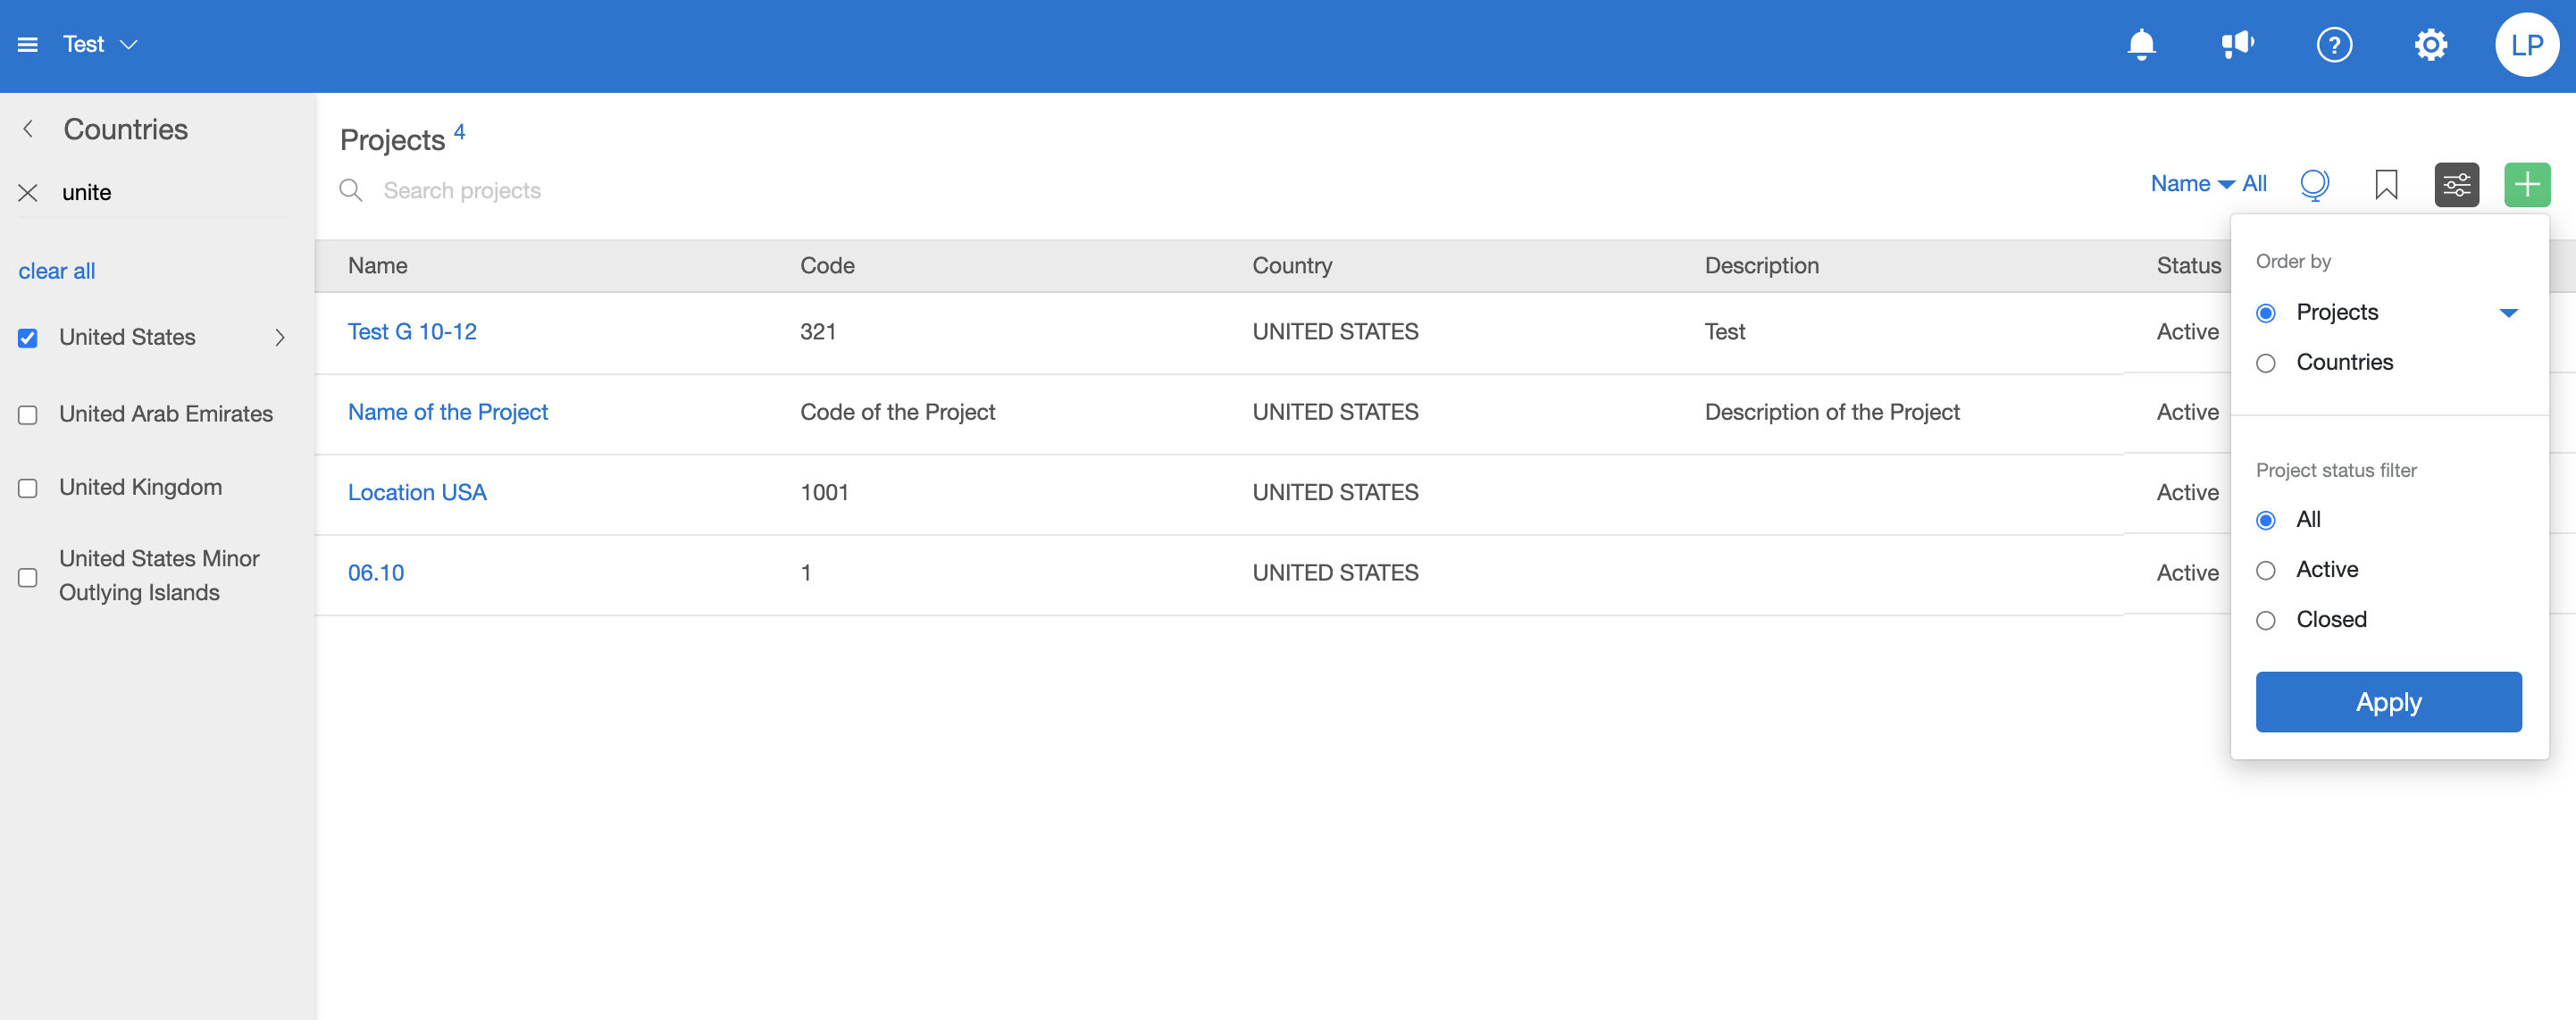
If you hover over a project on the far right, you will have the possibility to edit a project workflow, see the status details (when it was created and by whom), see the country and tags if they are added, edit the project, and delete it.

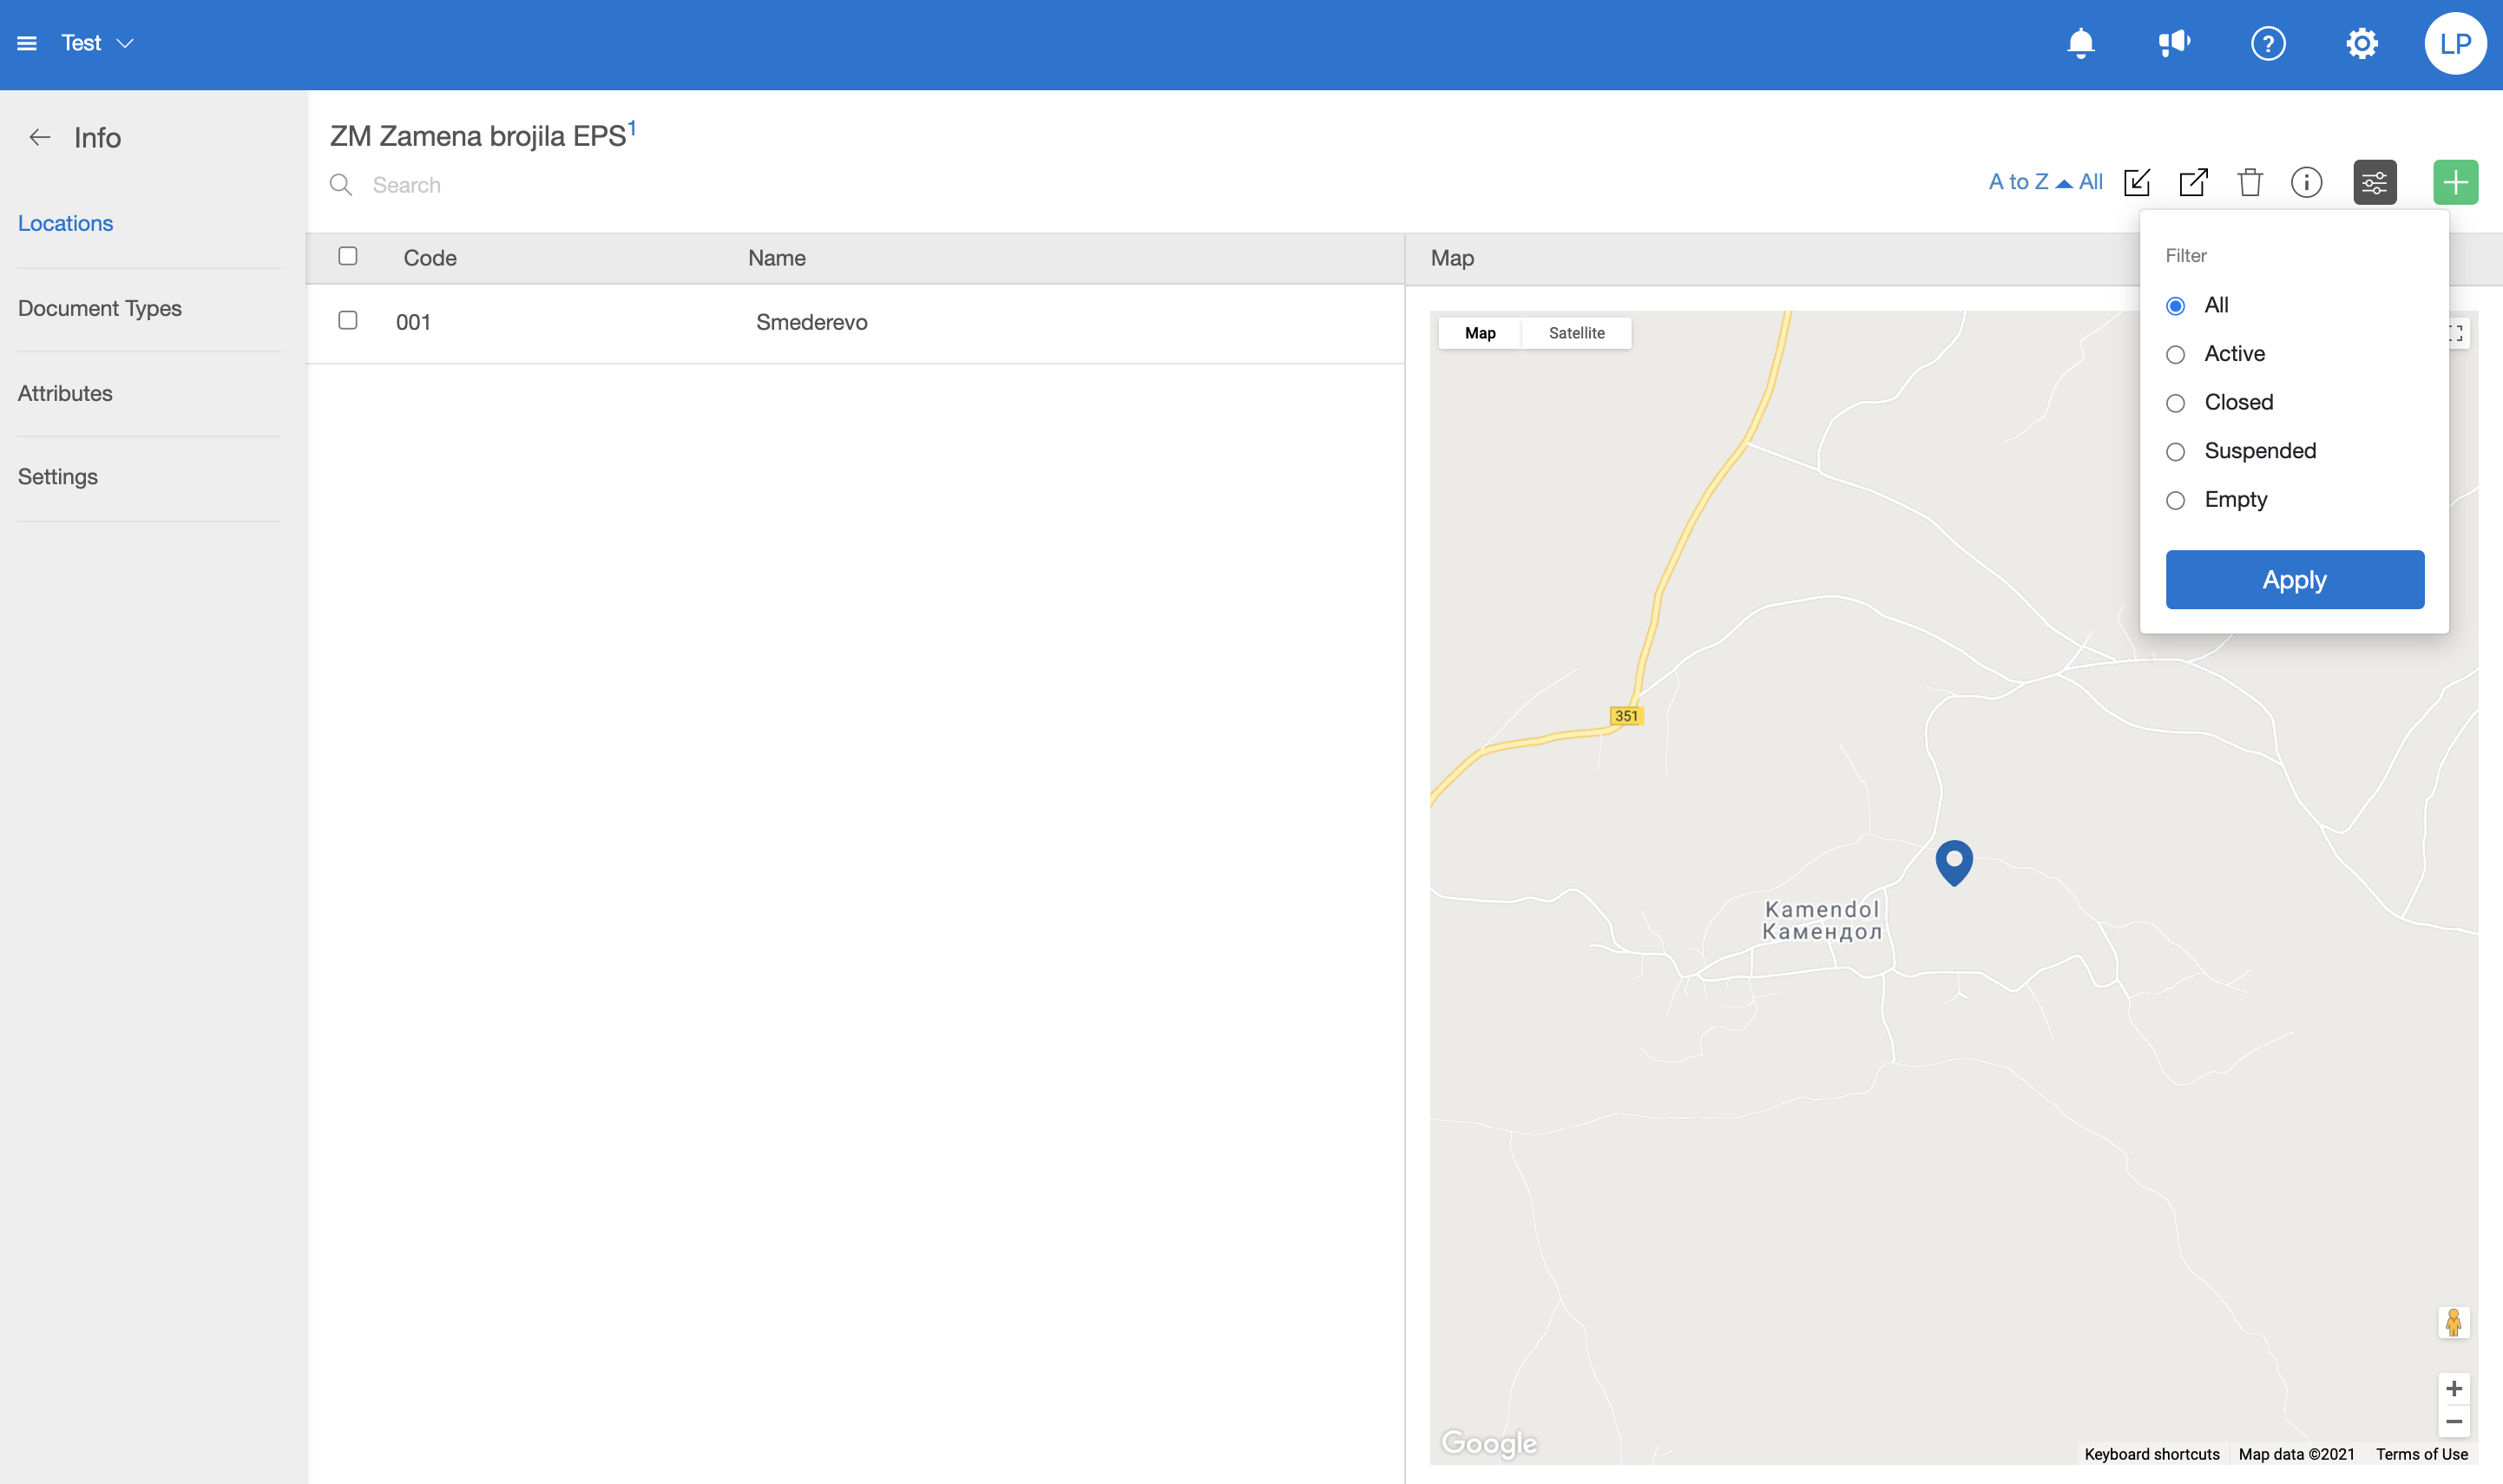
If you click on a specific project, all project sites will be displayed. You can create a new one by clicking on a green plus icon, import the list of sites, export, edit, and delete them.
- Import sites for projects from CSV file - Clicking the import button displays a modal window from which you can import sites.
- Export sites - Click this button to export existing sites into a CSV file.
- Delete site or marked sites - Click this button to delete an existing site.
- Edit the information about the project
- Turn on the filters (the icon becomes blue) - active, closed, suspended, or empty.
To import sites from a CSV file, click the import button and select filters for possible duplicate data in the CSV file. You can either upload a file from your computer or by drag-and-drop.